
Merging designs in Ink/Stitch
Wed, 08 Jun 2022
Even if you aren't a design digitizer, sometimes you want to do some basic design alterations. Your machine might have some capability built in, but it's easier with a mouse and full screen than with a little touch LCD. Fortunately, it's pretty easy with Ink/Stitch, even if you're not a regular Inkscape user. Ctrl-Z will undo whatever you last did, so don't worry about making mistakes.
Opening the first file
If one of your designs is in layered SVG format, you probably want to open that one first even if it's not the "outer" design. Otherwise it doesn't matter which one you open first.
I'm starting with the Mini Composition Book Cover, so I've got it in SVG format. Just a basic File > Open.
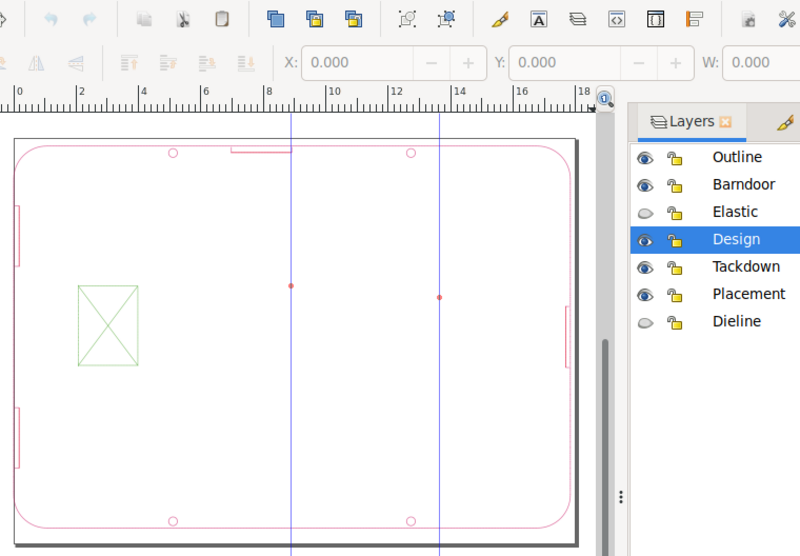
There's an empty layer named Design already. If you don't have one, just open the Layers toolbox (Layer > Layers) and hit the + sign on the lower part.
Breaking a design into layers
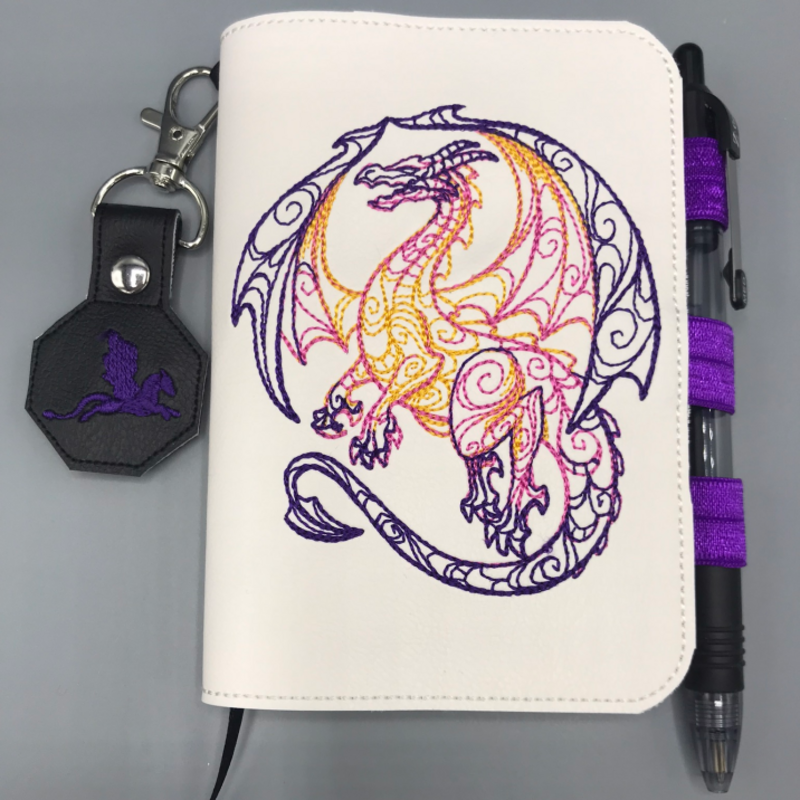
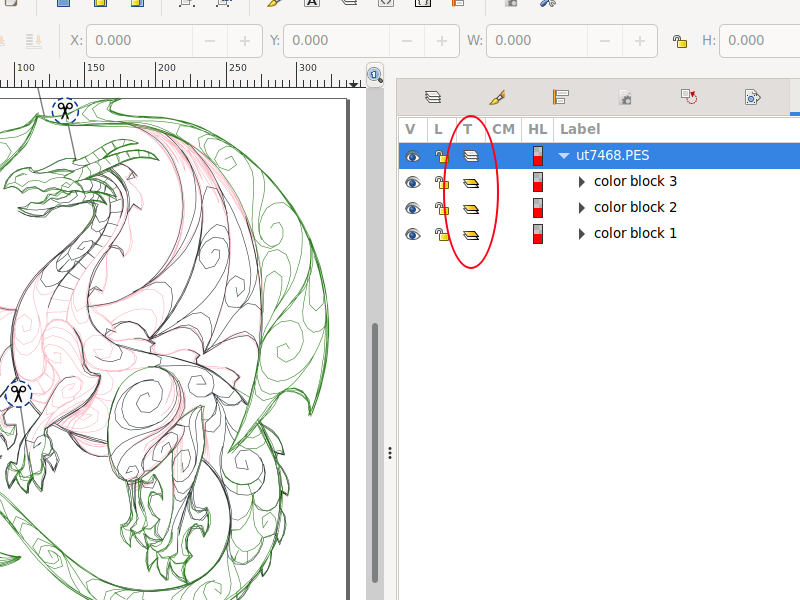
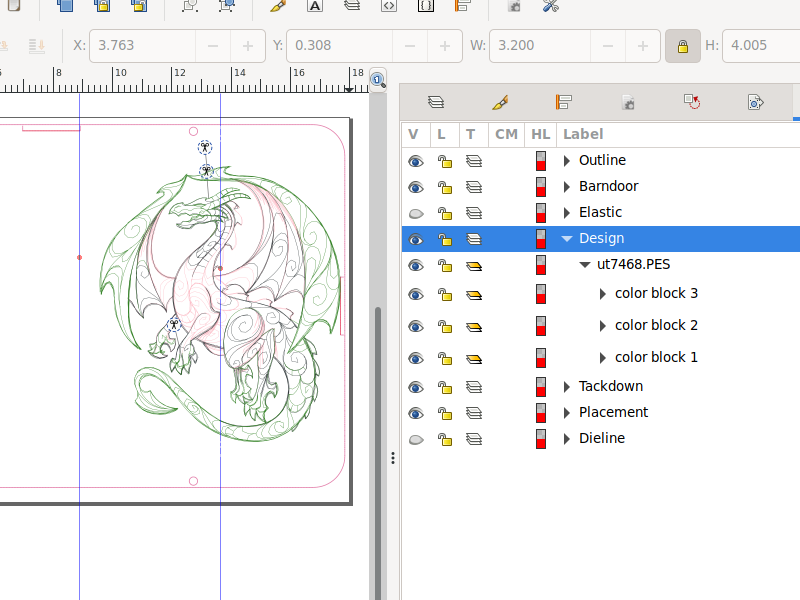
If you're not opening an existing SVG, you'll instead have just one layer named, creatively, the same as the file name. Inside this layer, every thread color is a Group. We're going to turn these Groups into layers. I'll use the bought design Doodle Dragon, from Urban Threads, to show this.
Open the Objects toolbox (Object > Objects) and you'll see something like the screenshot here. The "T" column has two icon types: three white sheets for layers, or a yellow on top of a white sheet for groups. If you click the icon on all the groups labeled "color block N," you'll turn them into layers.
Once you've done this, if you go back to the Layers toolbox you'll see the original layer, with nested layers for each color. (Note that this doesn't actually affect the exported design - it's up to you to keep all the stitch runs on a layer the same color. Look at Color Sorting with Ink/Stitch if you want more info on that.) Now you can hit the + sign in the lower area, and create an empty layer at the step where you want your design to be. Use the arrow keys in the lower right to put it where you want it.
Importing a second (or third!) design
To bring in your merged design, make sure the layer you want it to come in on is active. Use File > Import to select the file.
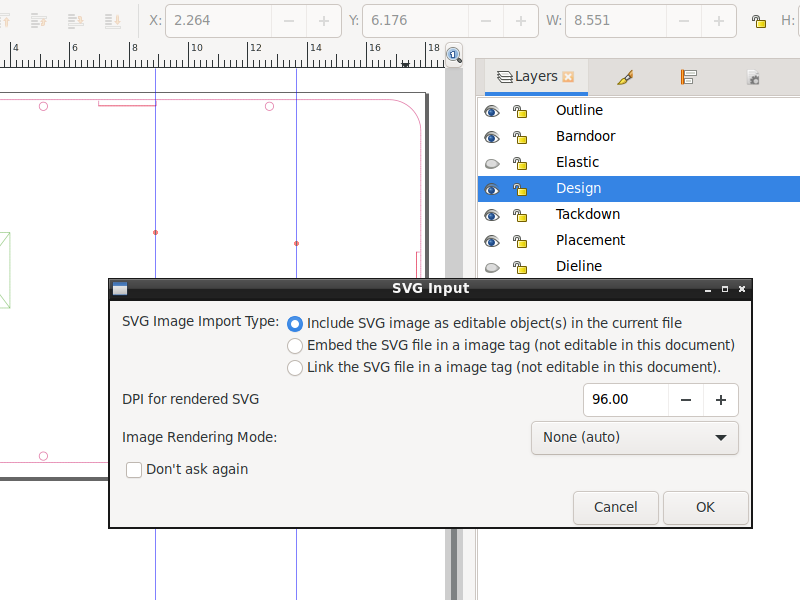
You want it to be editable, which should be the default. If you want to, you can check "don't ask again."
The design will appear on your selected layer, probably in the wrong spot. Drag it to where you want it.
Tips: If you accidentally unselect it, Ctrl-A will select everything in the current layer. If you accidentally clicked something else, you'll have to re-select the Design layer before doing this. If you're having trouble getting it into position and the other stitches are getting in the way, click the little padlock icons on the other colors. That'll freeze those and they won't be selectable.
If you want to, you can break the imported design into color layers; I usually only do this if I'm going to re-color threads, or if I'm going to duplicate the design and need it to be color-sorted. If you're merging with the Snap Tab Blanks for instance, you'll want to import a design once, break it into layers, then duplicate it to keep the colors together. (To select across layers, use the select tool to draw a rectangle around all the items. Lock other layers first if they're in the way. Then you can copy and paste as many copies as you need.) If you need to invert some for the snap tabs, click again on the design to put it in rotate/skew mode, and hold down Ctrl while dragging a corner arrow around to snap it to exactly 180 degrees.
Changing thread colors
If you import a design in the middle of another and their adjacent thread colors match, the final design will merge those colors even if it's not the same layer. This is good if you're merging a bunch of letters to spell a word, but maybe not so good if you needed the machine to stop so you can change the actual thread color, or so you can put the backing on a snap tab or notebook cover. Use Extensions > Ink/Stitch > Visualize and Export > Simulator/Realistic Preview to see how the design is going to stitch out, and make sure the color changes are correct.
If they're not, change one of the adjacent colors. To do this, first hide one of the two problem layers so it won't change, by clicking the little eye icon (eye-con?) next to it. The eye will close and the stitches on that layer will disappear. Next, click one of the remaining stitch runs of that color. If it's part of a group, and the color doesn't appear as the stroke color down in the lower left, click on an empty space to unselect it, hold down the Ctrl key, and click on it again to select just that run. If you can't select it, make sure you didn't lock that layer or any of its parents - click the padlock icon to unlock it.
Now right-click on that run, and you should see a menu that includes Select Same >. From its submenu, you want Stroke Color. You should now have everything of that color selected, but not the ones on the hidden layer. Now you can go to the color picker at the bottom of the screen, and choose whatever new color you want.
Lastly, re-open the eye next to the hidden layer, and check the preview again if you want to.
Saving As
If you save the file now, you'll overwrite the original, so you want to do a File > Save As. Rename it, and make sure it's saving in SVG format (don't worry, it'll warn you if you're not). This isn't strictly necessary if you don't ever expect to edit the file again.
Now you want to export the stitch format: File > Save a Copy. (You can also do another Save As, but if you do it'll immediately forget about the SVG you just made, and warn you about not having one when you try to exit.) I'm using Linux so my file export dialog probably doesn't look like yours, but there should be an option toward the bottom with a dropdown list of file types. Pick the right one for your machine type. Make sure it sets the extension correctly, though it should default to the right one.
Now transfer the file to your machine and you're done!
Troubleshooting
If you can't open a stitch file, or can't save as your machine type:
Make sure it's a format Ink/Stitch recognizes. It can import more types than it can export.
Make sure you have the most current Ink/Stitch.
If your machine doesn't recognize the file:
Is it case-sensitive? Older machines might require an all-caps filename, possibly in 8.3 format. Shorten your filename, take out spaces, and make it all caps.
Did you make it larger than your machine can handle? Some machines will simply ignore a file that's too large for it to stitch out.
Did you change the file type in the dropdown, or just change the extension? Make sure you select the option that says "Ink/Stitch: something Embroidery Format (.extension)" or it will not really save in that format even if you give it that extension
If the preview doesn't look right:
If your colors are merging, change them as above.
If you want to trim jump threads (and your machine has the ability), select the run you want to trim just like you do to change a color, above.
Extensions > Ink/Stitch > Commands > Attach Commands to Selected Objectswill bring up a list of available commands - check the box you want, andApply, thenClose.If your command balloons look like they're stitching out, they really will! Sometimes they get transformed into non-command objects (especially in older Ink/Stitches), in which case you'll just have to select them (probably by holding down Ctrl as you click) and delete them (don't forget their stems). Re-apply them if you need them.
If you are getting an Ink/Stitch error, go to the Issues and type in all or part of your error in the search box. If you don't have an actual error, try typing some relevant keywords. Chances are, someone has had your problem before. If not, ask! The Ink/Stitch devs are pretty helpful, as are a lot of experienced users (including me). You can also ask in the comments here and I'll give it a shot.
Advanced layering order
You probably won't need to change any of the layering orders for a simple merge, so don't worry too much about this.
If you nest your layers too much it can get pretty confusing. You can drag and drop layers to re-order them, bring them up out of deep nesting, or whatever. Play around with that and you'll see what the highlight is telling you about where it's going to drop a layer - as a sub-layer, or before or after.
Ink/Stitch stitches things out from lowest layer to highest, so that the thread version of a design will resemble the screen version as far as what overlaps what. This is true regardless of nesting - read your stitch colors from bottom to top, so a parent layer will stitch after all its children.
Toss a coin to your stitcher! (Ko-Fi)
Comments are not available.