
Using a 5×12 hoop on a 5×7 embroidery machine
Tue, 31 Aug 2021
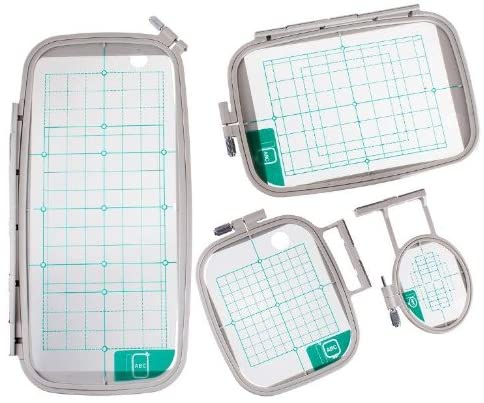
I have this hoop set 📦, which includes a 5×12 hoop, for my 5×7 Brother PE800 📦. It lets me stitch designs that are larger than can be made in a single hooping, without re-hooping… but there are limitations.
There are three mount points – all it’s doing is letting me stitch three separate (and overlapping) fields, without having to try to get them aligned identically. What it’s really for is stitching three repeating elements across, say, a sweatshirt front. But with Ink/Stitch or a similar design program, I can do a little more.
Update: There’s a similar hoop, the official Brother SA434, out for 4×4 Brother machines now. David Gileadi has contributed a template file to the Ink/Stitch project that has the same alignment frames that I explain below, only sized for the 4×6.75″ hoop.
Update again: if you use metric for your hoop, the 5x7 is actually 130x180mm, and the 5x12 is 130x320. This gives you a tiny bit more width, since 5 inches is only around 127mm. You can add the correct sizes with the instructions on the Basting Boxes page, but I took these screen shots without that.
Aligning a pre-split design
Some designs come pre-split. Nothing more really needs done with these, but you can add alignment rectangles to avoid having to do it using the machine’s panel. It works exactly as below, except you’ll import all the separate designs into a single Inkscape document.
Aligning separate elements
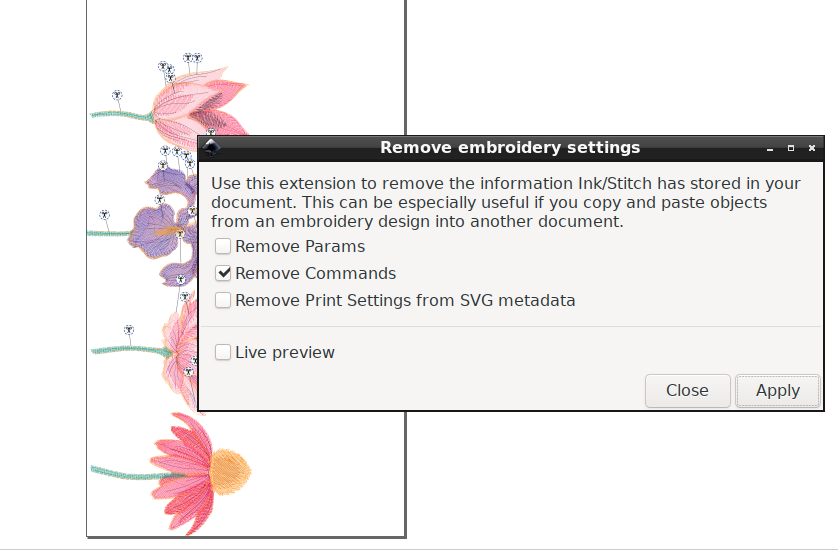
If your design has natural break points. Let’s do Urban Threads’ UT19639, an approximately 10×4″ design of four separate flowers. The first thing I’m going to do is Extensions > Ink/Stitch > Troubleshooting > Remove embroidery settings to get rid of the trim commands; a PE800 doesn’t do mid-color trims and they’ll just get weird while I’m moving things around.
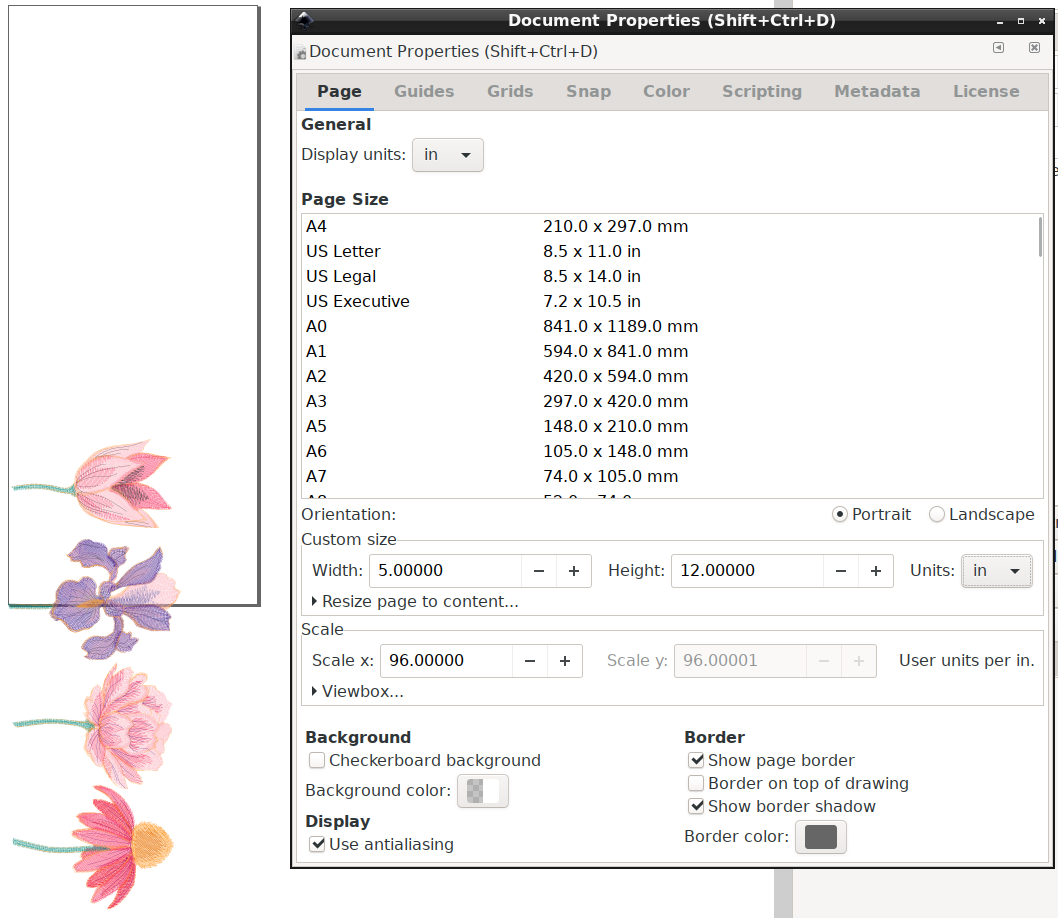
Next, I’m going to change the page size. The page doesn’t affect the embroidery file at all, but it helps me keep track of where things are.
Next I’m going to create 5×7 rectangles to delineate each mount point. They won’t be stitched out, but they’ll keep the machine from “helpfully” auto-centering my designs.
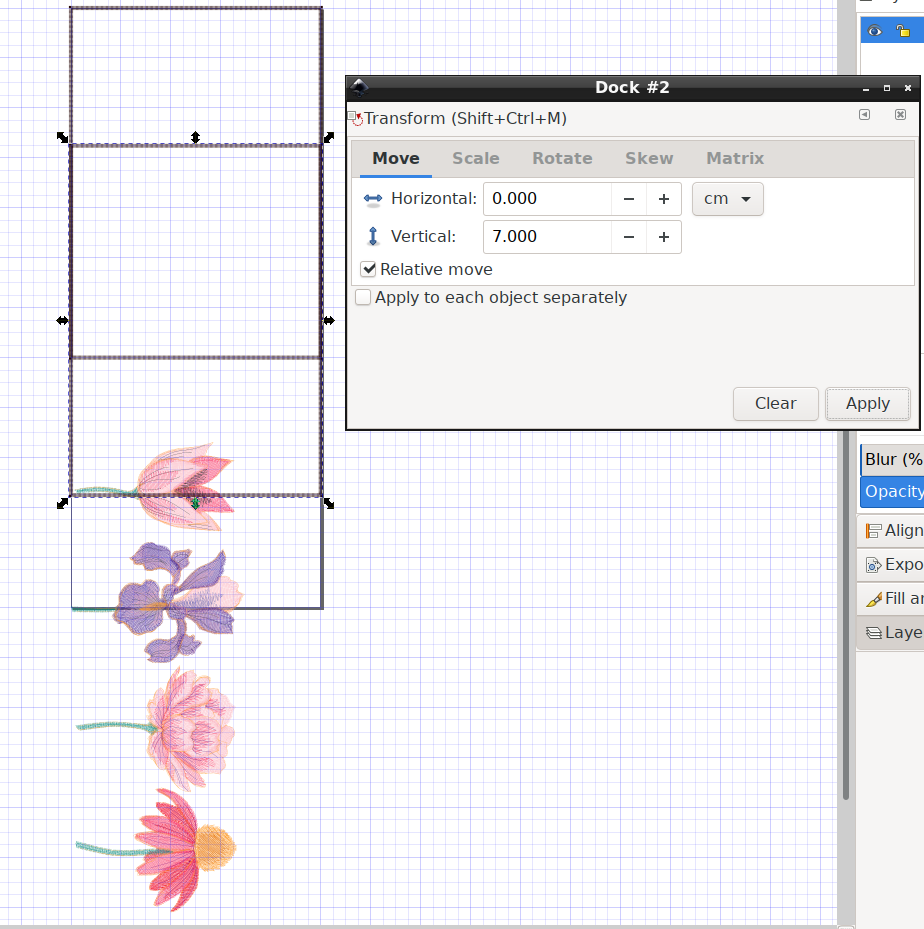
I’ll duplicate the frame, use Transform to move it 7cm down, and then do it again. The result is slightly longer than 12″, and the middle frame is entirely covered by the two end ones (again, the hoop is really designed just for repeating a design three times) so for this design I’m going to delete the middle one.
Depending on how your design is imported, even separate design elements may overlap the frames – here two flowers share a color, so they’re grouped. I’m going to Edit > Select All and then Object > Ungroup. (If it was a single object with a jump stitch, I’d have to break it apart, which I’ll cover in the next section.)
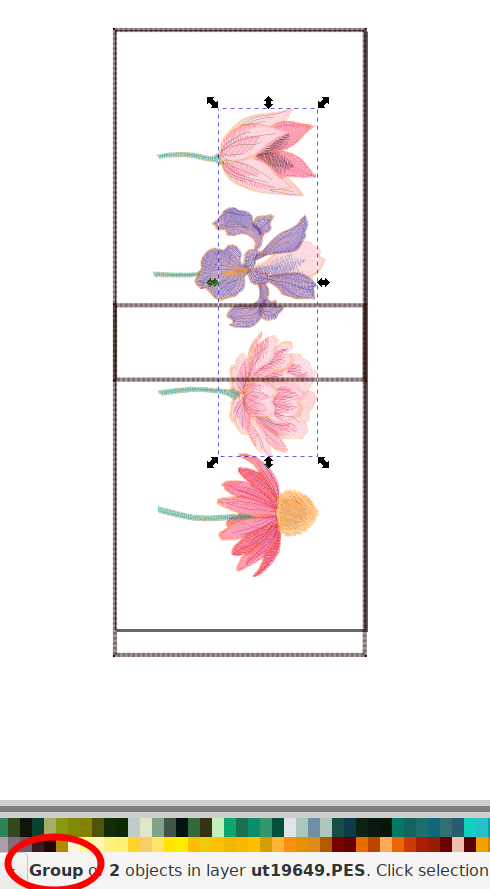
Now I can use the rectangle select to show that no objects overlap the divide between the center two flowers.
Using the rectangle select to pick up everything in the top 5×7 area picks up a little bit of the third flower. I can hold shift and click the objects I don’t want selected, which will deselect them, but in this case I may inadvertently select even more colors.
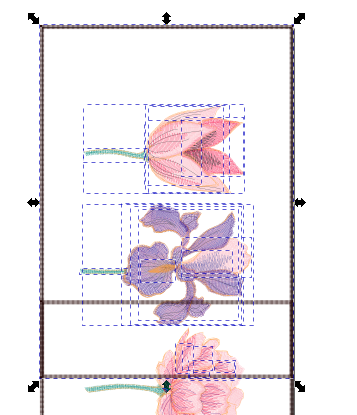
Instead I’ll use the rectangle select to grab just the first two flowers.
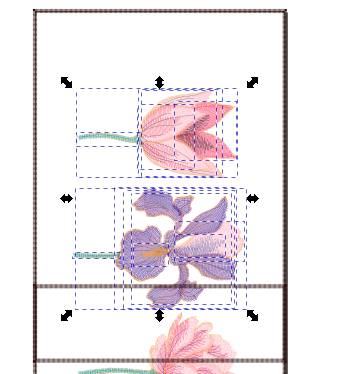
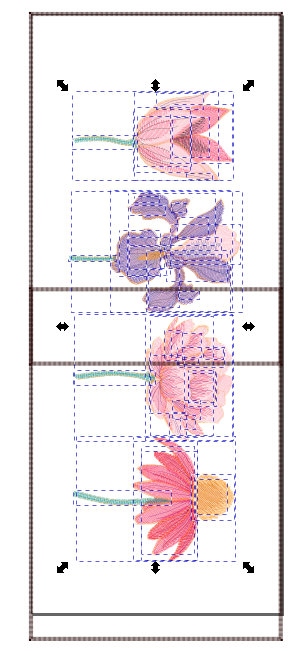
After this, holding shift and clicking the top rectangle will add it to my selection. I can now select Extensions > Ink/Stitch > Visualize and Export > Simulator / Realistic Preview to make sure it’s going to do what I want, or just go directly to File > Save a Copy to create the stitch file.
I’ll repeat the “select the flowers, add the rectangle, save the stitch file” process for the second half of the design, and now I have two stitch files. As far as my embroidery machine is concerned, it’s two different hoopings on what might as well be two different garments, but in the real world I only have to hoop my shirt once and not worry about alignment or hooping through previous stitching.
Don’t forget to skip stitching out the rectangle!
Breaking a continuous design
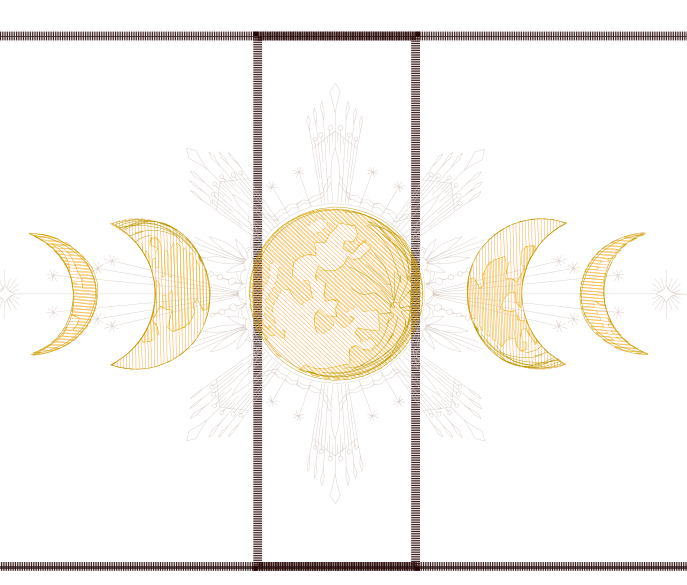
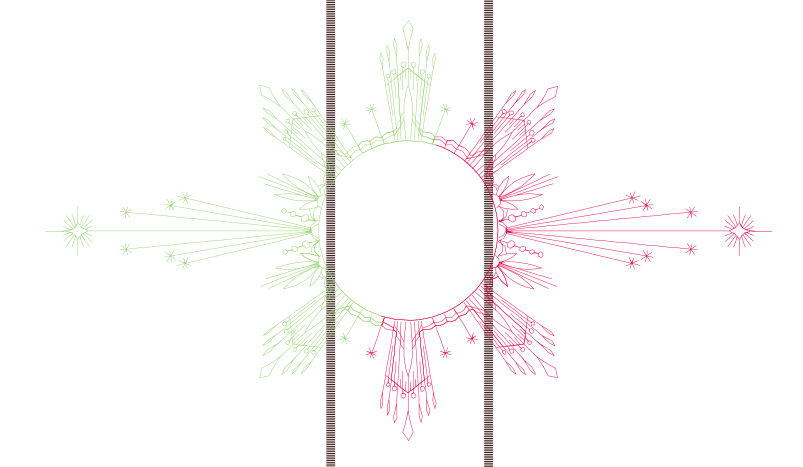
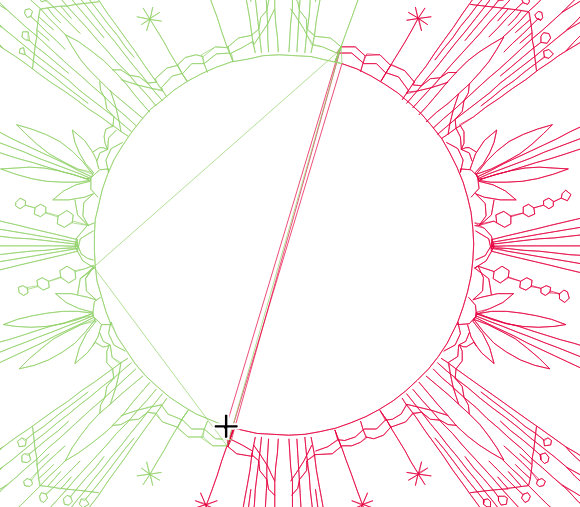
Breaking a more continuous design can be more problematic. If I use their UT21924 design (which isn’t larger than my hoop, but let’s pretend), three colors – the moon phases – have nice separation like the flowers above. But the background design is a continuous run, and it crosses back and forth across the centerline willy-nilly.
This is kind of a worst-case design; I’d recommend against splitting it. But if you really want to…
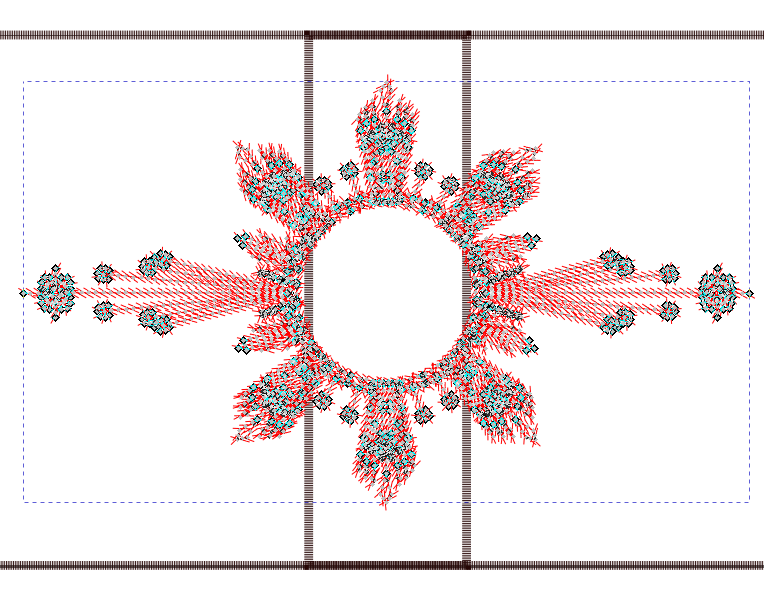
First, get that color object all by itself – move the others to a hidden layer or something. Now edit the nodes. Every node is a needle-down, so if you go into the node editor and select that object, you can see every little gray diamond (some overlap) where the needle goes through the fabric. Whew.
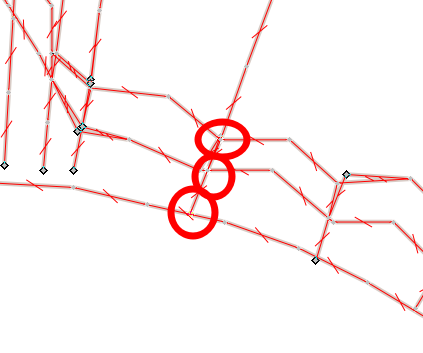
You can either do it surgically, or brute-force. Surgically, go into the Extensions > Ink/Stitch > Visualize and Export > Simulator / Realistic Preview and watch it stitch. Pause when you see it hit a good stopping point, go back to the node editor, and break that node. Or you can do it the brute-force way: zoom in on a likely spot, select all the nodes there, and break them apart.
Sometimes it’s hard to find a good point. I went 180 degrees across the circle and discovered that the stitches don’t even meet.
Luckily, this is a background color and so inaccuracies like this can slide.
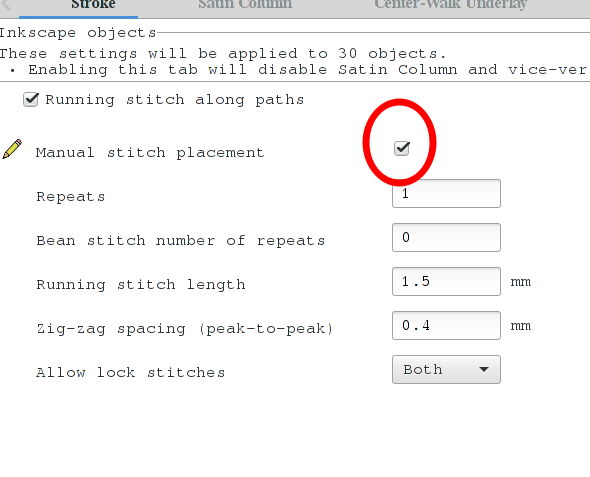
After a bunch of breaking apart, I selected all the pieces that I’ll stitch on the first pass and made them green, and all the pieces that I’ll stitch on the second and made them red, just to make things clearer. Breaking apart will cause all those paths to revert to the default settings, so I need to go into Extensions > Ink/Stitch > Params and make them manual again. (Technically, I don’t have to. I can just make them dotted lines and Ink/Stitch will choose its own stitch points. But for a detailed design like this where obviously some compromises have already been made, I’d rather keep the precise stitches from the original.)
So many broken-up pieces:
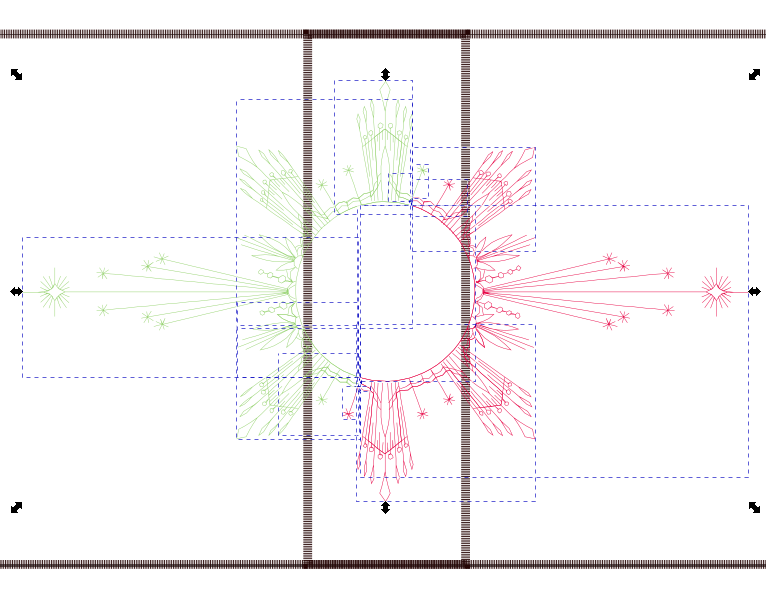
Most of those pieces are still right next to the ones they were broken from, so they’ll still stitch continuously. But the points where it used to go around the circle on the path of the other color are now places where it will skip across.
If I really wanted to, I could go in and rejoin those nodes. This design doesn’t care about stitch direction, so I don’t have to make sure the paths are still being followed in the same direction. Or I could leave it as is, and just clip the jump threads.
How much cleanup I did would mostly depend on whether I intended to stitch this design out more than once.
Most designs won’t be nearly this bad about crossing and re-crossing the center line, with one exception: fills.
Splitting designs with fills
Don’t.
Seriously, don’t. If the fill doesn’t fit entirely in one hooping or the other, you aren’t going to be able to make it match precisely enough. Even if you’re splitting your own design rather than node-editing an existing fill (yikes), you’ll get a visible “seam” where the two fills meet. You may be able to get away with two feathered fills that overlap each other, but it’ll take some practice.
Even if a single fill does fit in one of the hoopings, fills are going to pull the fabric and make things much harder to correctly align – even though you’re not physically re-hooping, the fabric still shifts as the stitches affect it, and the plastic hoop frame itself warps more in the 5×12 size than even the 5×7. (On that note, if your design is narrower than 5″, align the design toward the frame attachment side where it’s more stable.)
Splitting designs works best with lighter designs, especially those with some room for error. Look at the Urban Threads pre-split designs to get an idea of what’s possible. These designs do play it safe, and with a little practice you can push the boundaries – but there are physical limits to the accuracy of the alignment.
Toss a coin to your stitcher! (Ko-Fi)
📦: Technically, that's an affiliate link. I recommend showrooming on Amazon and buying somewhere else though.