
Cropping existing designs with Ink/Stitch
Fri, 01 Mar 2024
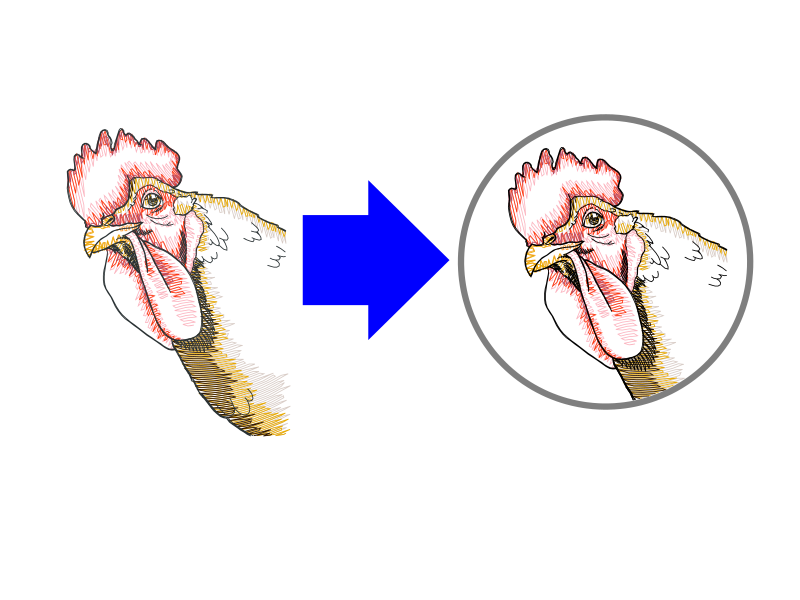
Urban Threads dropped a set of six dragon coasters today, all made from pre-existing designs of theirs, most of which I already own. It's probably worth paying for them just to save myself the trouble but... there are a lot more designs that would make good coasters. Here's how to do that with Ink/Stitch.
This tutorial is based on having only a stitch file to work with. If you have the source SVG (e.g. one of my designs), that would be a different tutorial.
Are you an Ink/Stitch pro already? You probably don't need walked through this. All you need to know is: to properly cut a manual-stitch line, do a Path Reverse first, because a quirk of Inkscape will reverse the order of the child objects if there's more then one and this will make sure they end up in the right order. After you do a Cut Path, reverse the child objects again and they'll stitch in the right order and right direction.
Getting the file ready
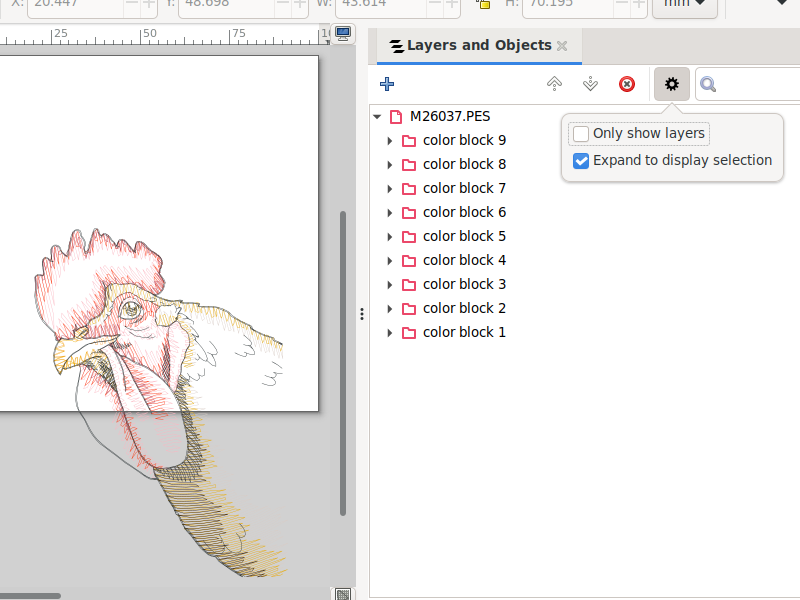
Turning a stitch file into a layered SVG makes it easier to work with, and is the first step in most of my tutorials. The Object/Layers handling has changed over time; these screenshots are from Inkscape 1.3.
Open the file in Inkscape (with Ink/Stitch extension). If you have multiple formats to choose from, you probably want one that includes color information, even if that's not the format your machine takes. If you're not sure, grab JEF or PES. If you only have, say, DST, it's perfectly fine, you just get more, er, festive colors.
You can either clear the trim commands, or do like I did and hide them with Extensions > Ink/Stitch > Commands > View > Display|Hide.
You may also want to do a File > Document Properties > Display and set the page size to 100mm x 100mm (the size of a "4x4" hoop) and set your display units to millimeters. This doesn't have any impact on the final stitch file, but it'll make your screen match mine.
Open the Layers > Layers and Objects dialog. If your "color block" list doesn't show, go into the gear icon and uncheck "Only show layers." Right-click on each color block and choose Group to layer from the menu. (Older Ink/Stitches did this from the Objects dialog, and by clicking an icon.)
This is probably a good time to do a File > Save As and save the SVG source somewhere. If you do a regular save, you'll overwrite the original stitch file (you make backups, right?)
Making the coaster stitches
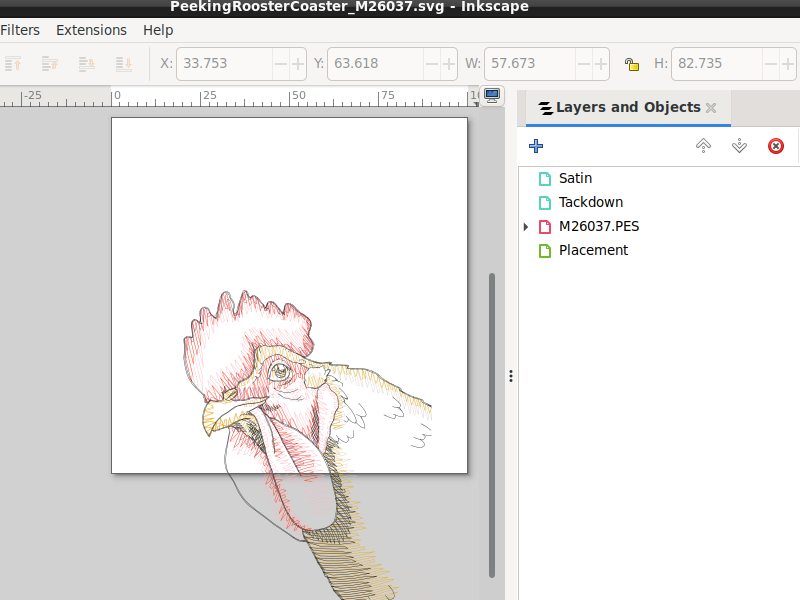
Hit the + and make some new layers. It's not strictly necessary, but it makes it easier to keep things in the right order.
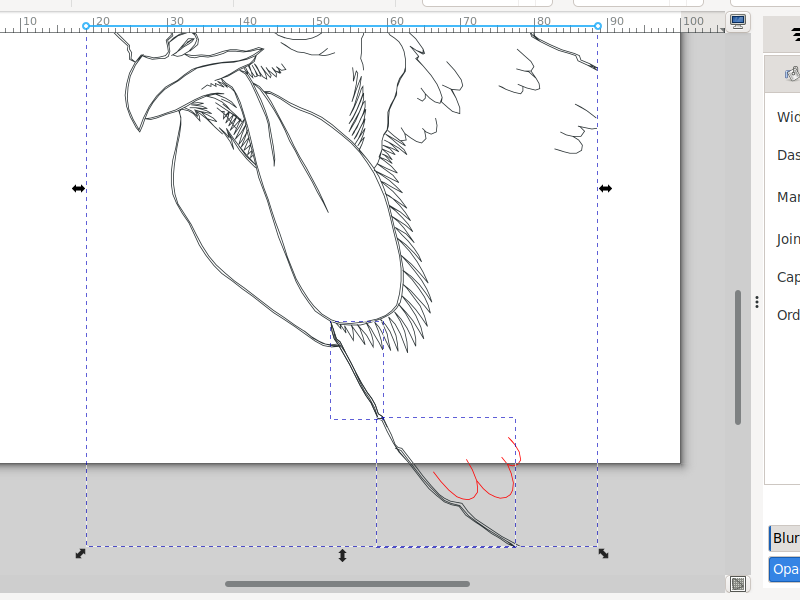
Decide on the size of your coaster. Select the Satin layer. Use the circle tool to drag and create a circle. Use Object > Fill and Stroke to set the stroke to 3-4mm, then use the toolbar to set it to the size you want. I also used the toolbar to set it to the place I wanted.

Drag the design to where you want it, or drag the circle to the design - Ink/Stitch doesn't care about positioning relative to the page.
In hindsight, I should have made the top edge of the rooster's body meet the edge of the coaster. Think more carefully than I did about your image placement before getting too deep into clipping the shapes!
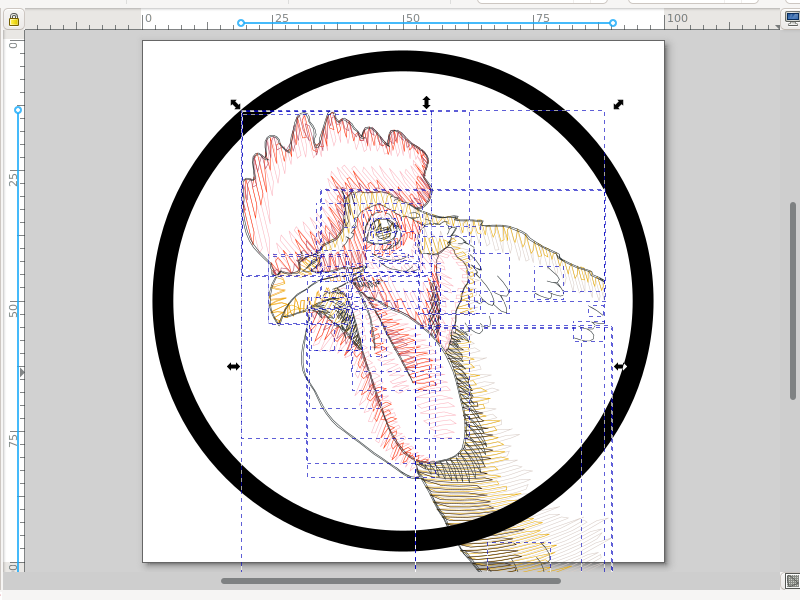
Convert the line to a satin with Extensions > Ink/Stitch > Tools: Satin > Convert Line to Satin. Change the Method to E-Stitch, which is the closest an embroidery machine can get to a true merrowed edge. It should have the solid line around the outside of the circle but if for some reason it doesn't, check the Swap Rails box.
Now create two more circles, one in the Tackdown and one in the Placement layer. The Placement stitch should be about a millimeter out from the inner satin rail, and the Tackdown about a millimeter and a half in from the outer. I change mine to a 1px dotted line to remind me it's a basting stitch, and I change the stitch length to 3.5mm in Params, but that's purely optional.
The Tackdown will be your clipping shape. Object > Duplicate it, and move it to a color-block layer.
If you're doing something other than a coaster/patch, you really only need the clipping shape. You can put it on whatever layer you want, just make sure you never destroy your last copy while cropping.
Cropping a color
Right-click the layer you moved your first clipping shape too, and choose Show/hide other layers (that's "show [this layer] and hide other layers").
If you have stitches that fall completely outside the clipping shape, you can just select and delete them.
If there is more than one stitch that you'll need to crop, change the stroke color of the one you're working on. After it's broken up, you can select one piece and then right-click and Select Same... Stroke Color to pick up all the pieces.
There are some quirks about how Inkscape orders the resulting objects when breaking up a path, so the first thing you need to do to the stitch you're working on is Path > Reverse.
Now select the circle and the stitch, and perform a Path > Cut Path. The circle will go away (this is why you used a duplicate), and your stitch is now a group of paths. Every once in awhile a bug in Inkscape will leave a segment uncut - if this happens, duplicate the Tackdown circle again and just do another Cut Path.
Select and delete everything that falls outside the circle. Then select everything that remains, and Path > Reverse it so it stitches in the correct order. Change the stroke color back to match the other stitch objects in the layer.
If there are any more stitches in the layer that need cut, repeat the steps. Then unhide the next color block layer, and repeat the process.
Reassembling all the colors
Once you have cropped all the threads, show all the color-block layers, and drag to select everything. Or use Edit > Select all in all layers.
Then do Extensions > Ink/Stitch > Params and change the stitches back to Manual Stitch. (Inkscape has, under the hood, deleted the original object and created a bunch of new objects, which didn't inherit the Ink/Stitch parameters. This happens with a lot of Inkscape functions, unfortunately.) If it's already set to Manual Stitch, select Running/Bean, then select Manual Stitch again, to make sure it triggers the change across all your objects.
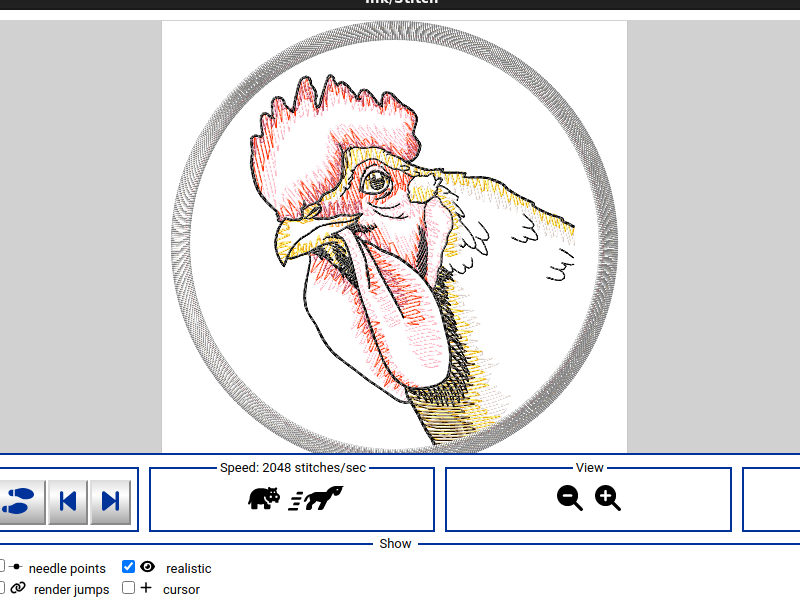
Now show all the layers, and use Extensions > Ink/Stitch > Visualize and Export > Simulator to make sure it's all stitching out correctly. Check the "Realistic" box and/or watch the stitch animation to make sure everything's happening in order and you don't have any fill stitches stitching backward (with the underlay on top) or anything.
I didn't do it on this one, but you might consider right-clicking the Tackdown layer and choosing Duplicate layer. Move the second tackdown layer to right before the Satin.
To stitch a coaster, stitch the Placement on tearaway stabilizer, and float a circle of felt or vinyl on the hoop. The felt should be the size of the Placement circle, not the outer satin line. Tape it down, then stitch the Tackdown to hold it in place. Stitch the design, then right before the Satin, take the frame off the machine and very carefully tape a second circle in place on the back. Run your second Tackdown if you have one, then run the Satin to bind the front and back together. Tear away the stabilizer, use tweezers to pick out any remaining fluff, and you're done!
Usually this is where I'd offer the finished file for free, but since this was made from someone else's base design, I can't.