
The embroidery resizing problem
Fri, 05 Mar 2021
I got a question on Instagram:
“Do you think Inkscape would be an option for a beginner to combine/resize/edit existing designs?”
The short answer is “yes/maybe/yes,” but that “maybe” was too long for an Instagram comment so here’s a little more about it for people new to embroidery. If you already know about fill resizing, skip to the end for a discussion of faking it in Ink/Stitch (or please, leave a comment telling me a better way if you have one!)
Your store-bought embroidery files will almost always be a ready-to-stitch file. It’s kind of like bitmap versus vector: you can resize a bitmap to a certain extent, but there are limits. With a vector file, you can resize it to your heart’s content, thought some special features might need a little tweaking by hand.
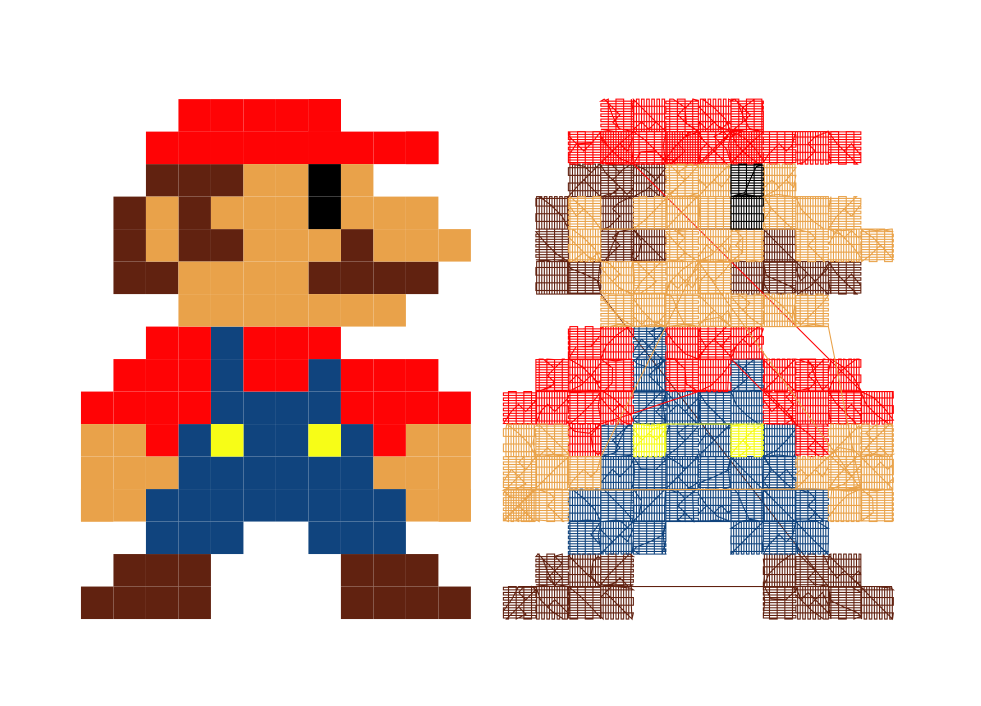
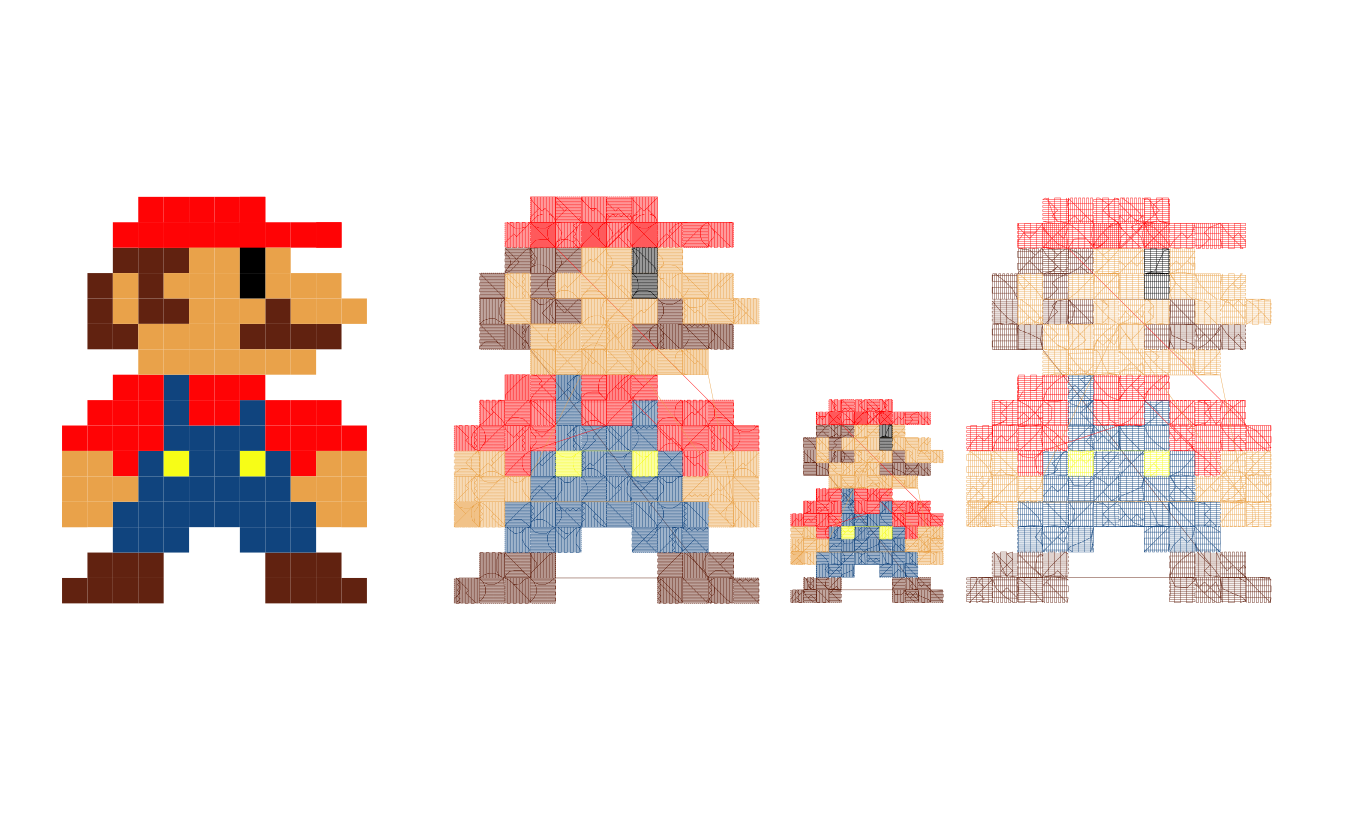
Here’s a comparison. An Ink/Stitch SVG, on the left, is a vector. It’s got the information on each object that says “fill stitch this, with every other square at a 90-degree angle, with underlay and some pull compensation.” When I create the embroidery file (PES, for me), I get a file that consists of color changes and coordinates for every needle-down, but that doesn’t happen until the very last step so I can resize my shapes all I want before that. A store-bought file will just be the type on the right. I can import it into Ink/Stitch, but I won’t end up with the file on the left – I’ll end up with a series of paths, where each needle-down becomes a node, and each path is the color of the thread.
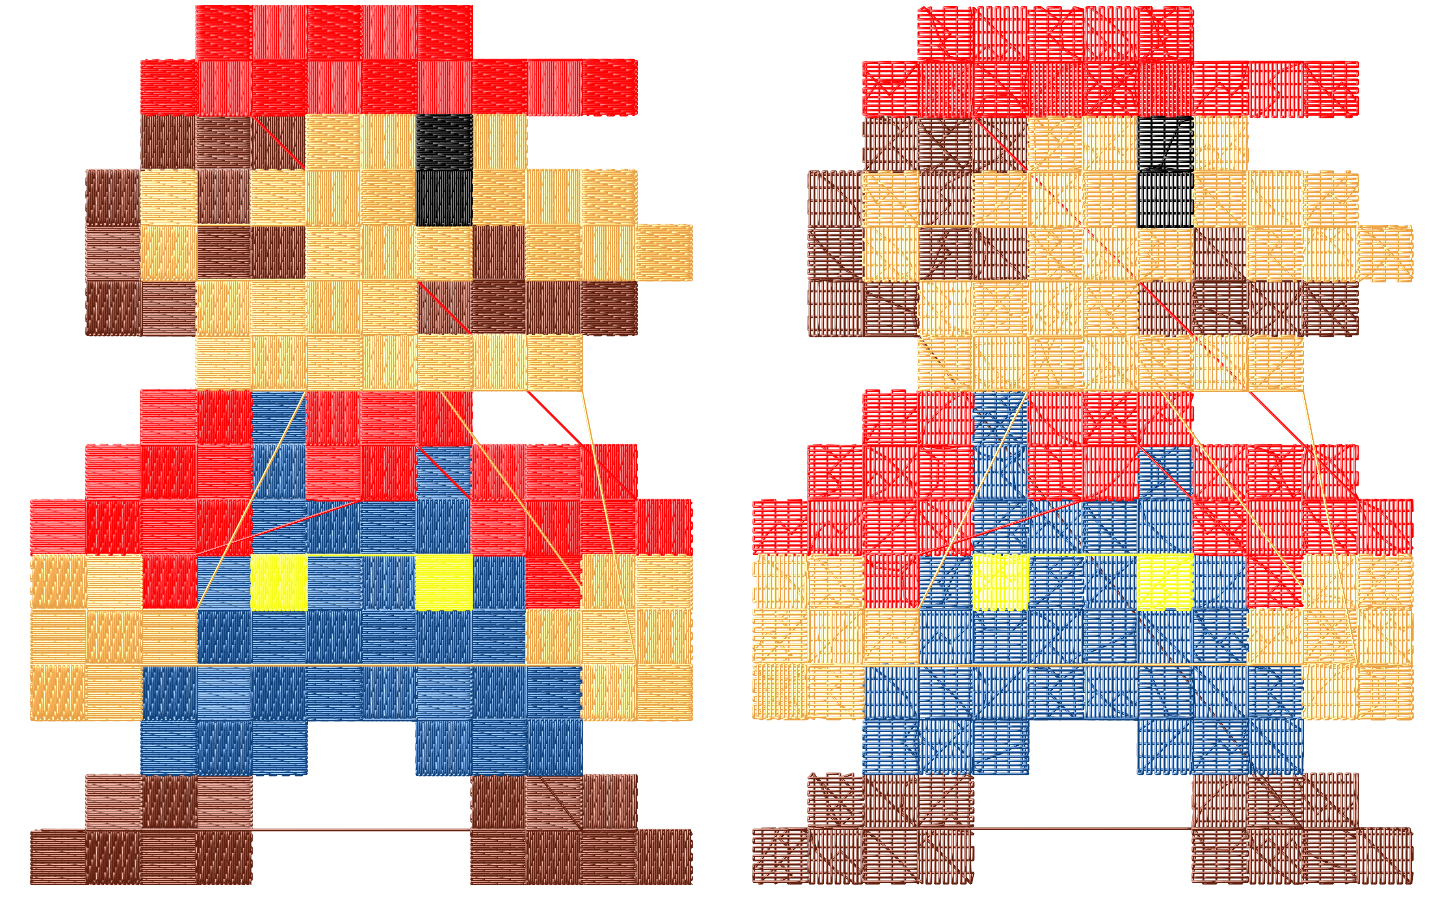
If I double the size of both of those Marios, the SVG-native one will generate a fill with the correct density. The imported-PES one will just make each needle-down twice as far apart – the fill rows will suddenly show backing in between them, and the stitches will be longer and looser.
This is less bad with line-art designs. If it’s a running stitch, you can tell Ink/Stitch to turn off manual stitch placement. It will then use whatever stitch length you have given it to re-generate the needle-down points. Sometimes this means you lose a little of the sharpness in turns (because Ink/Stitch is not, as of this writing, smart enough to always choose to put a needle-down at the point of a an angle), and you probably have to remove the tie stitches before letting Ink/Stitch generate more. Bean stitches, though? Bean stitches are as much a problem as fills:
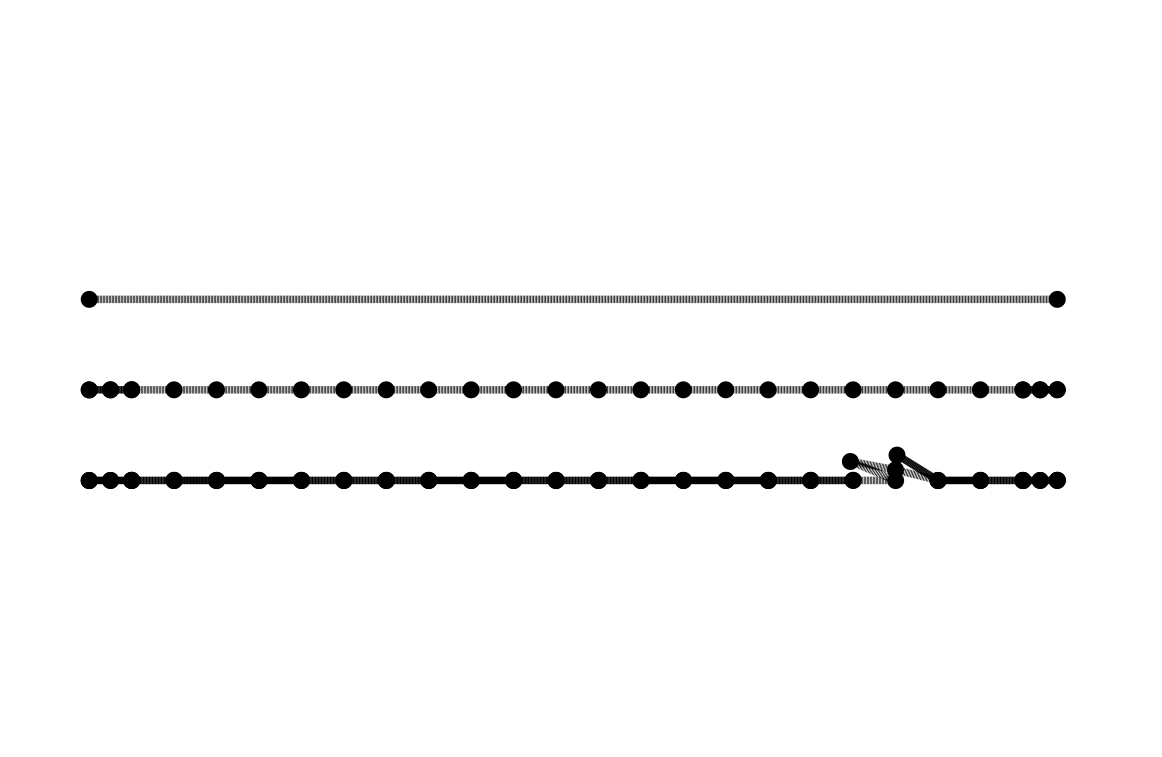
Here are three left-to-right lines of stitching. I’ve added a marker at each node so you can see how it works. The first one is an SVG-native line. Two nodes, long enough for about 23 stitches at Ink/Stitch’s default. The second is a generated running stitch. Some tie stitches at each end, and a node for each needle-down along the way. Edit out the tie nodes, uncheck the manual-stitch box, and you could re-size this line as much as you wanted and Ink/Stitch would re-generate it with proper-length stitches.
The third one, though, is a generated bean stitch: forward-back-forward, forward-back-forward. I’ve pulled a couple of the nodes out so you can kind of see what it’s doing. If I try to re-size this by bypassing manual stitches, Ink/Stitch will try to faithfully follow the path, with all kinds of random needle-downs. Sometimes you can fool Ink/Stitch into smoothing out the path with various combines and whatnot, but other times it’s just hopeless. I’ve been fiddling around with a little script that will recognize duplicate needle-downs and remove them, and someday I’ll turn it into an Ink/Stitch plugin, but that hasn’t happened yet.
Satin stitches are the one thing you can’t just arbitrarily re-size in an Ink/Stitch SVG. The stitch density will always be correct (so no gaps or overlaps between the stitches), but the stitch length can get problematic. Satin columns narrower than 2.5mm start to get problematic, and extra-wide ones need extra pull compensation, will eventually start to break thread, and are prone to snagging and wearing more quickly in use. Update: Newer versions of Ink/Stitch include Convert Satin to Stroke, which will create a stroke that follows the centerline of the satin. You can adjust the stroke width to produce a zigzag of the desired width, then Convert Stroke to Satin. You'll end up with satin that's a consistent width throughout, so you might need to edit it a bit if the original varied.
Resizing a stitched-out satin is even worse. That’s another plugin I’ll write someday: splitting the two sides of a zig-zag into two paths. For now, there isn’t an easy way to do it.
There are dedicated softwares to resize embroidery designs, which will work with varying degrees of success. I haven’t messed with any.
Okay, I promised a way to turn a stitched-out fill back into a vector shape, so here it is: follow the instructions in the blog post on knockdown stitching, except don’t make your stroke width any wider than you have to to get a mostly-filled space. Follow the instructions down to “now you have a knockdown shape!” mentally changing that to “now you have a fill shape!” It’ll be a little lumpy, and just a smidge large than the original. You can mess around with Path > Simplify and Path > Inset and some node editing to clean up/shrink the shape.
You can try the same thing with a satin stitch, and sometimes it works pretty well. Once you get a fill shape, open the ends of it, reverse one of the two resulting paths, and add rungs to it. Of course, if the satin came with a centerline underlay, just use that like you would the Convert Satin to Stroke above.
And now you see why I include the SVG source files in the ZIP files – it’s vastly easier to edit the vectors and re-create the embroidery files from them.
Comments are not available.