
Mini composition book covers
Mon, 05 Aug 2019
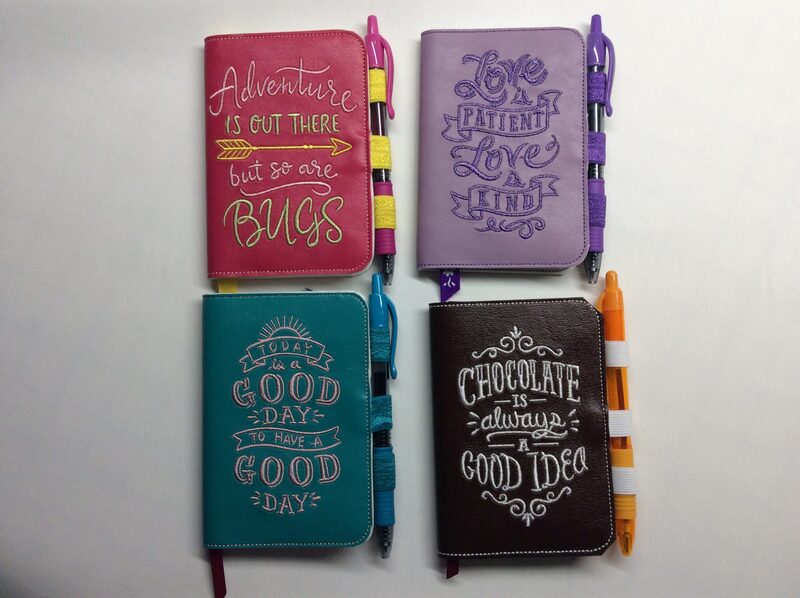
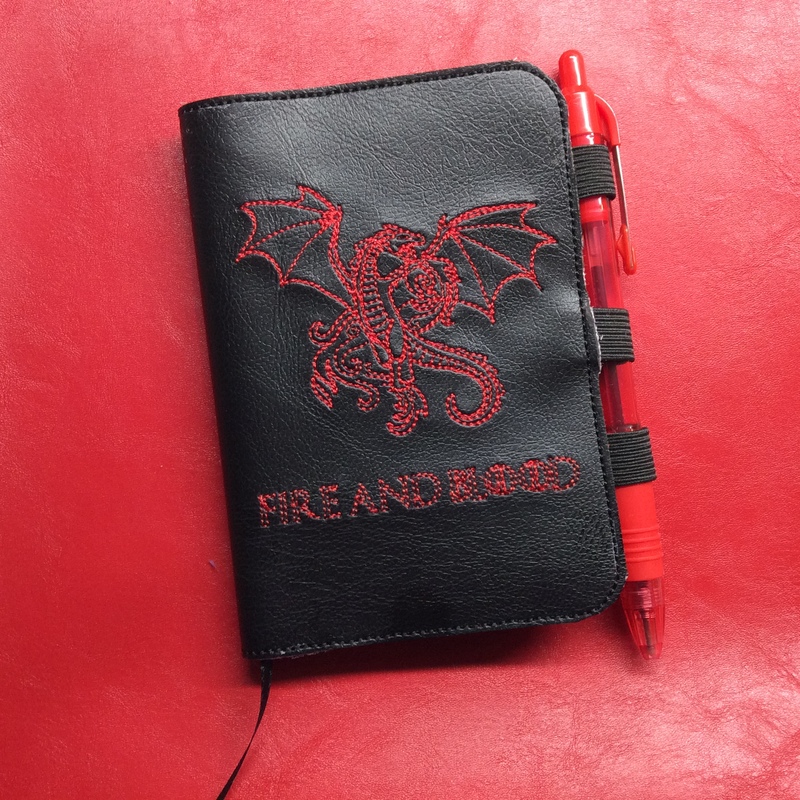
I spent the weekend making little vinyl covers for dollar-store mini composition books, mostly for my nieces’ back-to-school care packages. It’s one of my favorite designs: the pen loops also hold the notebook closed.
You can make them on a conventional machine if you don’t have an embroidery machine (or yours is too small), but you can make them entirely in the hoop of a 5×7″ machine.
They also don’t have to be vinyl, just something non-fraying and sewable. Felt, leather, tree leather, plastic bags ironed together to make a fabric; there are a lot of options. You may want to use a different fabric for the cover than for the interior, especially if your main cover is a heavy vinyl or leather.
Some fraying fabrics can be stabilized with Heat N Bond 📦 or the like. If you’re using something lightweight like quilting cotton, the outside piece should probably be bonded to some heavyweight interfacing 📦.
You also don’t have to use an interior piece of fabric other than for the pockets, especially if you don’t have embroidery showing on the back of it.
Prepare your pieces
Read this post first – I don’t make the pockets the same way anymore.
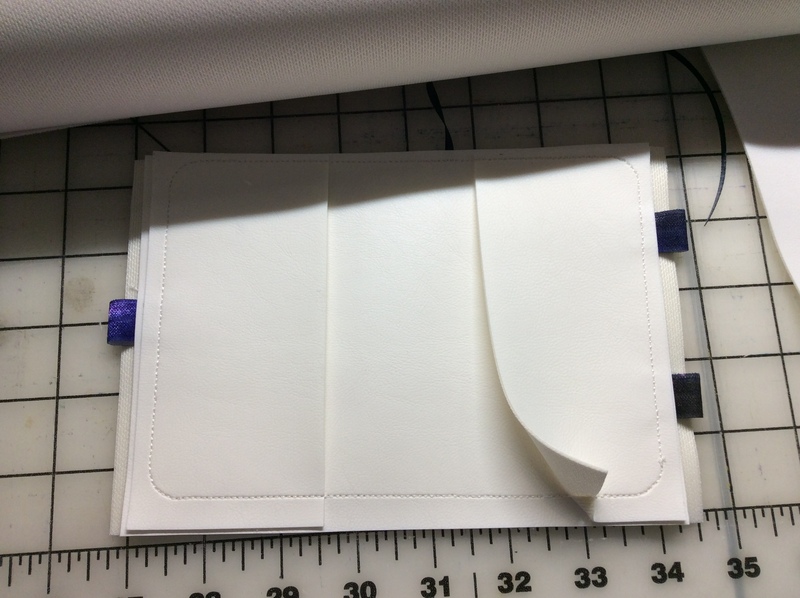
Cut a piece of your main cover material 5 1/4″ by 7 1/4″, and a piece of the lining material the same size (optional). Cut two pocket pieces 5 1/4″ x 2 1/2″ or, if you’re using quilting cotton, cut two pocket pieces 5 1/4″ x 5 and fold around 5 1/4″ x 2 1/2″ pieces of interfacing so that the folded edge will be the edge of the pocket.
If you have a 4×4″ embroidery machine, embroider your design now, centered about 1 7/8″ right of the center line. The same goes if you’re appliqueing a design, or using any other decoration method that will show through the back of the cover.
Cut three pieces of elastic about 2 1/4″ long. This will fit G2 or Zebra pens; if you’re using a different size of pen you’ll have to experiment to see what works for you. Cut a piece of ribbon (optional) six or so inches long.
On an embroidery machine with a 5×7″ hoop
In the download archive, you’ll find ready-to-use embroidery files as well as the source SVG. You can insert your embroidery design in the Design layer in the Inkscape SVG, centered on the guide line, and use Ink/Stitch to produce a complete embroidery file to use on your machine. If you use different embroidery design software, insert your design before the final stitch color.
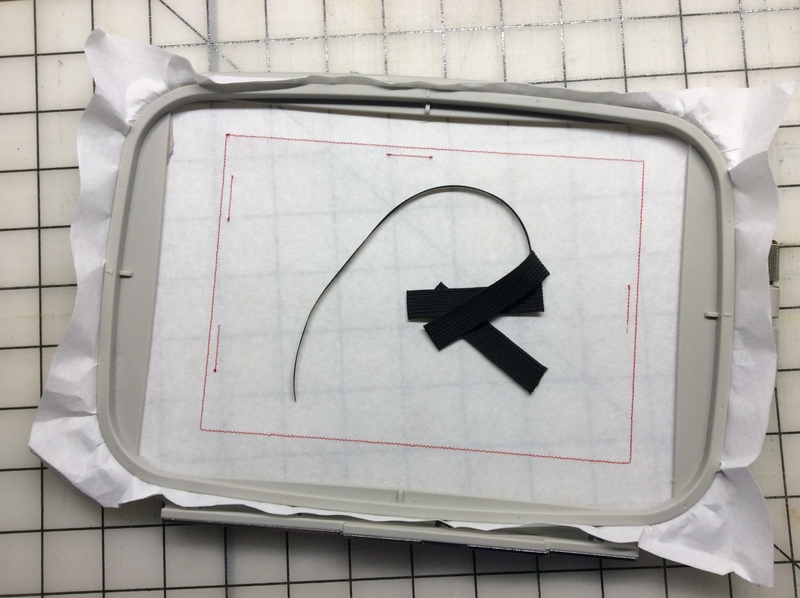
Hoop a piece of any type of stabilizer and stitch the outer placement line (optional) and elastic placement marks. Fold your elastic pieces in half and tape them down over the tackdown lines. Tape the ribbon in place at the top. The raw edges should extend about 1/8″ in from the tackdown lines. If your ribbon has a right and wrong side, the right side should face the same way as the main cover (so that it faces up when folded over into the notebook). Try to keep the tape either all the way inside the topstitching line, or more than 1/8″ outside it.
Stitch the tackdown lines (they will go right over the placement stitching), watching closely to make sure nothing gets bumped out of place.

Float your main cover piece face up, making sure it extends at least 1/8″ past the outer placement mark, or 1/4″ past the tackdown stitching. Stitch your cover design if you haven’t already.
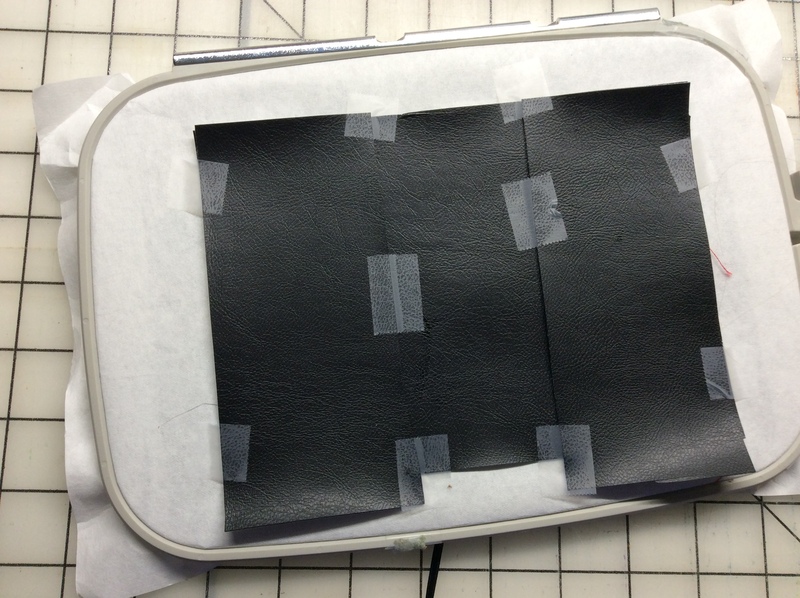
Take the hoop off the machine but don’t unhoop the piece. Turn it over and tape the lining piece onto the back with the two pocket pieces at each end. If you’re using bonded quilting fabric, make sure the sides with the fold face each other on the inside.
Put colored bobbin thread on if you’d like — it will show on the inside of the cover. Replace the hoop on the machine and stitch the topstitching. Pay particular attention when the machine is stitching the left side (the bottom edge of the cover, closest to the hoop attachment on most machines), and make sure that edge of the pocket piece hasn’t gotten scraped loose/folded under.
That’s it! Now skip to the end for trimming notes.
On a conventional machine
Build a sandwich of the pieces. The main cover and lining go right-sides-together, with the two pocket pieces at each end. If you’re using bonded quilting fabric, make sure the sides with the fold face each other on the inside.
Using the SVG from the download as a template (you should be able to print it from a browser even if you don’t have Inkscape), fold your elastic pieces in half and pin or clip them in place along the sides, between the main cover and lining. Pin or clip the ribbon in place at the top. The raw edges should extend about 1/8″ in from the tackdown lines. If your ribbon has a right and wrong side, the right side should face the same way as the main cover (so that it faces up when folded over into the notebook).
Make sure everything is properly aligned, take a deep breath, and carefully topstitch all the way around the outside. You can follow the SVG as a template and round the corners, or you can just sew a 6 7/8″ x 4 7/8″ rectangle.
Trimming the cover
You can use a straightedge and rotary cutter to trim the entire bottom edge, about 1/8″ or a little less from the stitching. For the other three, be careful and skip over the elastics and ribbon. Then take conventional scissors (applique duckbills work well), carefully fold the elastic/ribbon down, and trim the cover piece. Then fold the elastic/ribbon up, and trim the stabilizer (for embroidered covers) and lining/pocket pieces.
You can cut the corners off at a 45-degree angle, or carefully round them with scissors or a heavy-duty corner rounder.
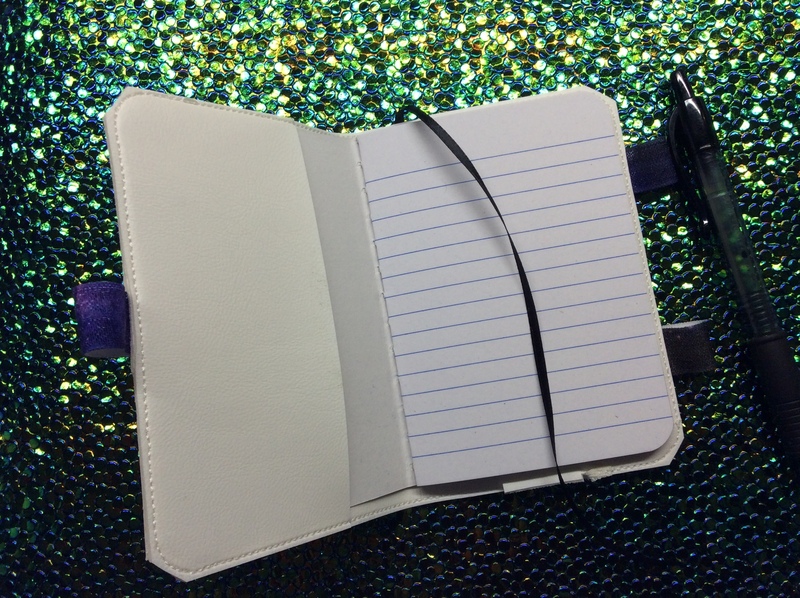
Now you’re done! Tuck the covers of your composition book into the pockets, slip a pen in the loops, and that’s it.
Comments are not available.
📦: Technically, that's an affiliate link. I recommend showrooming on Amazon and buying somewhere else though.