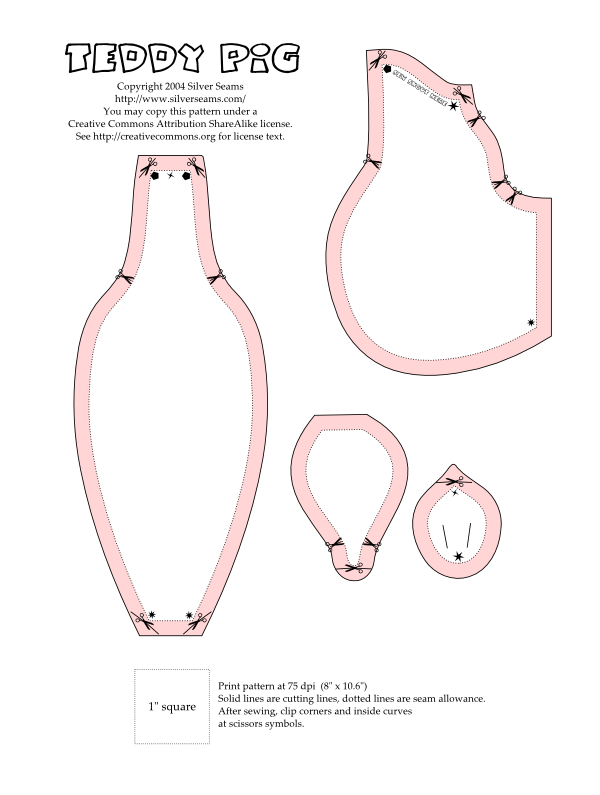
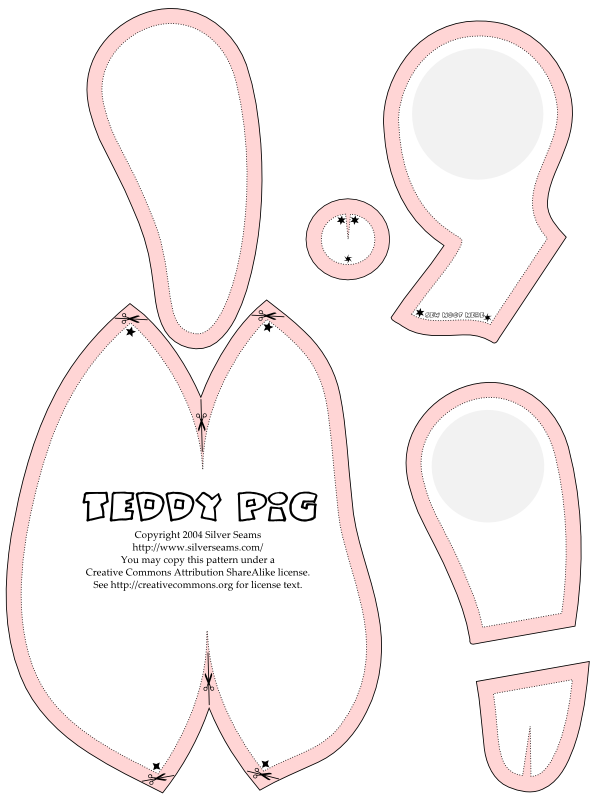
This is one of my old patterns, from 2004. Someday I will update it, but for now here it is for posterity. (The link on the image doesn’t work anymore.)
Copyright/Licenses
Copyright 2004 Silver Seams.

This work is licensed under a Creative Commons Attribution-Share Alike 3.0 United States License.

This work is licensed under a Creative Commons Attribution-Noncommercial 3.0 United States License.
The Pattern


General teddy-bear construction instructions can be found in any teddy bear making book (and in many other places on the Internet), so I won’t repeat them here.
To get a Teddy Pig in the same scale I made, print it out at 75 dpi, or 8″ x 10.6″. A little more or less won’t matter, but if you scale him a lot you’ll need to ignore the seam allowances, cut the pattern on the dotted seam line, and then add corrected seam allowances back in. You’ll also need to adjust seam allowances depending on the fabric you’re using – if it’s likely to fray, cut a more generous seam allowance, then trim after sewing.
The gray shaded circles show the (recommended) joint size – 1.5″ and 1.75″, or 38 and 45mm. You can use smaller joints if you can’t get those sizes – they’ll result in puffier limb tops, and you’ll need to make sure the center of the joint is still in the same place. The limb placement is approximately at the point of the side darts, but test-stuff the body before final placement.
The base of the head is gathered around another 1.5″/38mm joint, and goes at the top of the upper dart.
He’s a pretty straightforward “bear,” with the slight exception of his snout and hooves. The former is relatively simple – sew the head as usual, but leave the end open and then insert the end piece (point goes up) just like a pawpad (and cut it from pawpad material). Needlesculpt the snout by anchoring the nostril stitches as you would the eyes… pull very tight for a shorter, more wrinkled snout, or leave looser for a long-nosed pig.
The hoof “pawpads” have darts in them, though I discovered in practice that they weren’t sufficient to make much difference and ended up needlesculpted anyway.
For the tail, sew a small (four or five inches long by perhaps half an inch wide, plus seam allowance) rectangle, leaving one short end open. Before turning, sew a running stitch along the seam allowance on one side, making sure it’s very securely anchored at the closed end of the tail. Turn the tail, then pull the running stitch to gather it, forming the tail into a curl as you do so. Tie off the gathering thread, turn the seam allowance in and sew the tail to the body securely.