These big square fobs (about 2" wide, finished) are made for stitching with pre-printed vinyl, though you can just as easily merge conventional designs on just like with the other snap tab blanks.
They're SVG-only, so you'll need to load them up in Ink/Stitch to use them. When you open the files and the Layers dialog, you'll see these:
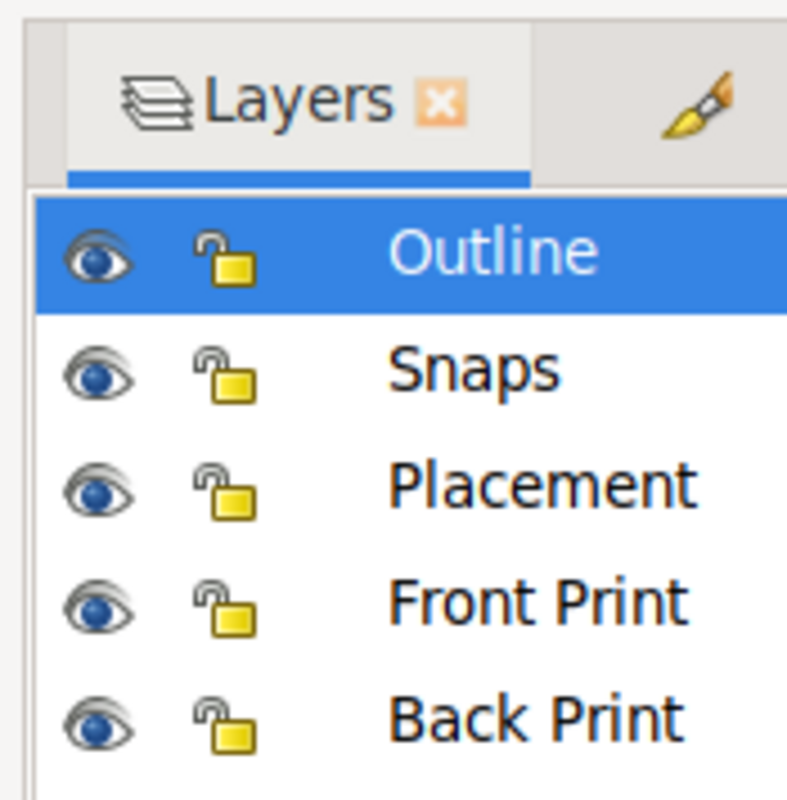
Some of those are for printing, some of those are for stitching, and the Placement layer is for both.
Creating a pre-printed design
The Front Print design layer has a background rectangle appropriate to the size of each hoop. It's just a little bigger than the max stitch field, to leave space around the topstitching. The Back Print is blank, but you'll probably want to copy the rectangle over - even if you leave it non-printing white, it'll help you export the correct bitmap.
Lock your Outline and Placement layers to keep them from getting shifted while you draw your design. Ideally, do a "full bleed" design that doesn't require exact trimming or even exact stitching, though especially on the front you can usually get it pretty precise.
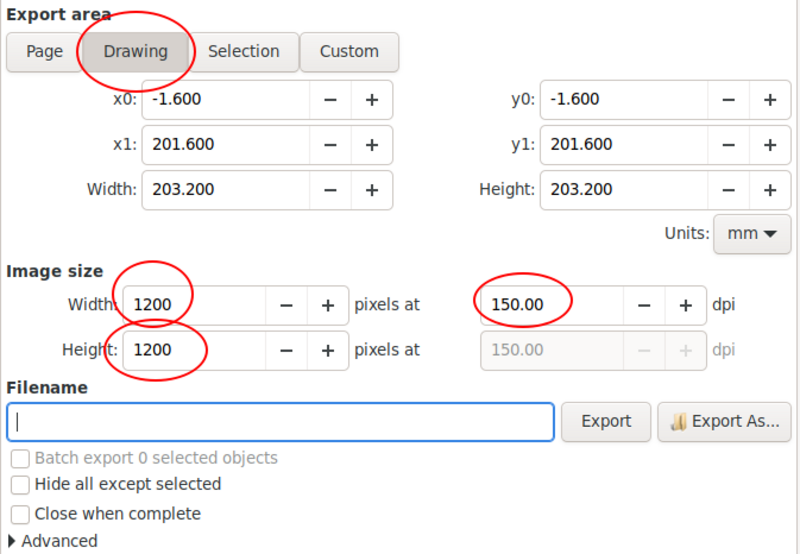
When you're done, hide the Outline layer. Change the Placement and Snaps object colors if needed for visibility. Export your bitmap however your print service requires - make sure you export the full Drawing, and double-check the math to make sure your dpi works out to the right number of inches. For example, here's my export of an 8" square, at 150dpi.
Stitching the design
To stitch the design, hide your print layers and snap layers, and just export the Outline and Placement layers in your preferred format.
The four placement corners should pause in between each one. Position your machine at the beginning of the first stitch (if it doesn't go there automatically) and put the very corner of the placement mark directly under the needle. (Manually wheel your needle down to almost touch the vinyl, if your machine allows it.) When you're sure the position is correct and the vinyl is reasonable square to the hoop, stitch the first placement.
Correct the alignment for the second placement corner the same way, and stitch it out. The remaining two corners should fall right into place, but nudge them a little if they need it.
Take the hoop off the machine and flip it over. If you don't have a design on the back, place your backing piece so that it covers the placement marks. If you do, align it to the marks and tape it in place. It may help to trim the corners of the vinyl down to the placement marks, so you aren't completely hiding the marks you're trying to align to. When you're satisfied, stitch the outline stitch.
Tip: If the outline tends to pull in on the back, as my example did, dial your top tension up just a notch and it should stop pulling the top thread through. (If you have manual tension, make sure you mark where it came from so you can set it back!)
The ZIP file includes 4x4, 5x7, 8x8, and 6x10 sizes.
[Big Square Fobs, ZIP]
This is copyrighted by Silver Seams in the year noted in its URL, and licensed under Creative Commons’ [CC-BY-SA](https://creativecommons.org/licenses/by-sa/4.0/). This basically means you’re free to sell items you make from it, provided you give reasonable attribution, and that if you modify it you’re required to share your changes with the world under the same license (the actual legal bits are in the link).
Toss a coin to your stitcher! (Ko-Fi)