Special-effect fills with Ink/Stitch

We’re going to get a little adventurous with the effects today, using a feature that hasn’t been added to Ink/Stitch’s menus yet.
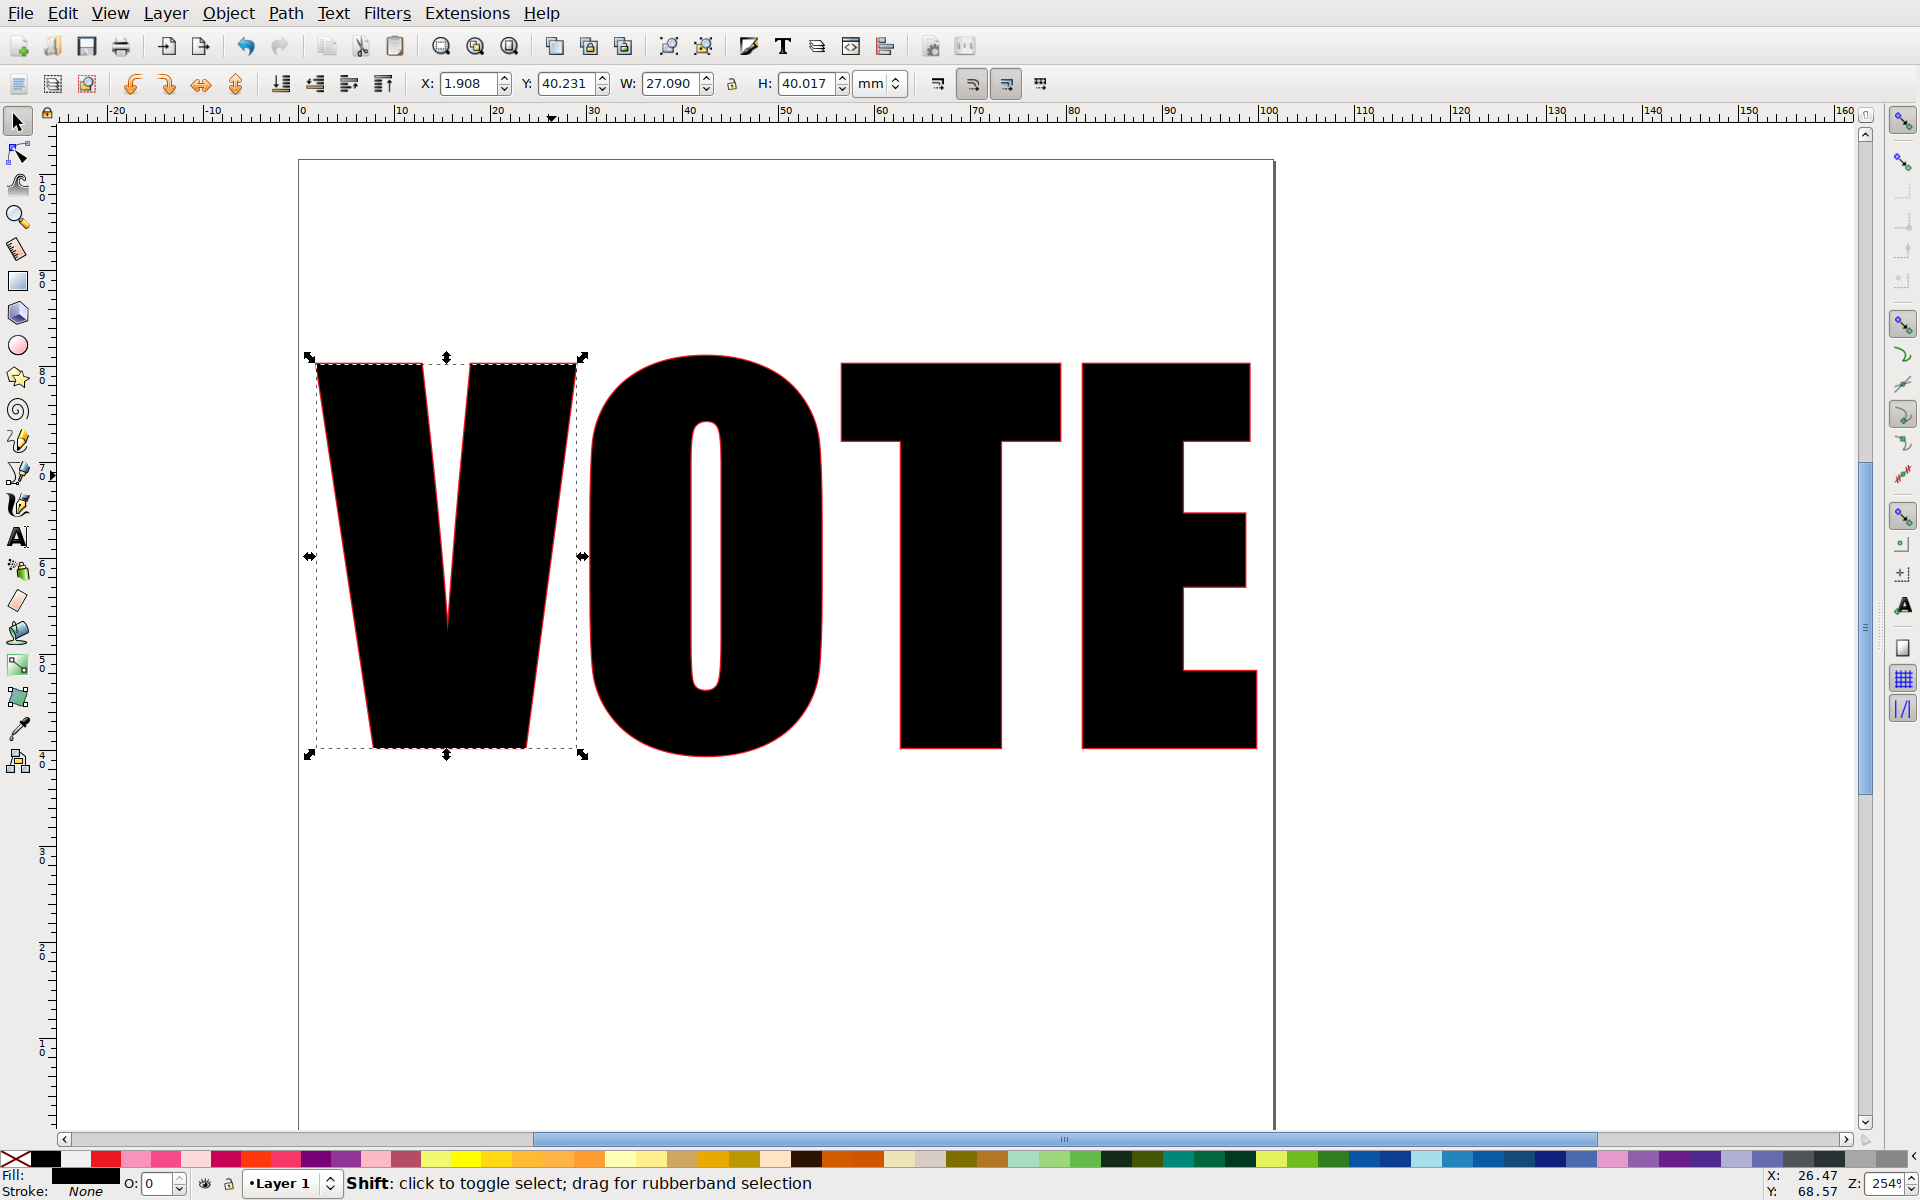
First, I’m going to prepare my objects that I’ll want to fill. In this case I’m using text (not Ink/Stitch lettering, but Inkscape text) that I will convert to shapes and ungroup (Path > Object to Path, then Object > Ungroup). I will want to make a satin-stitch border, so I’ll make a second copy of the objects to work on (Edit > Duplicate). So I can keep track of which is which, I’ll remove the fill and add an outline to one version.
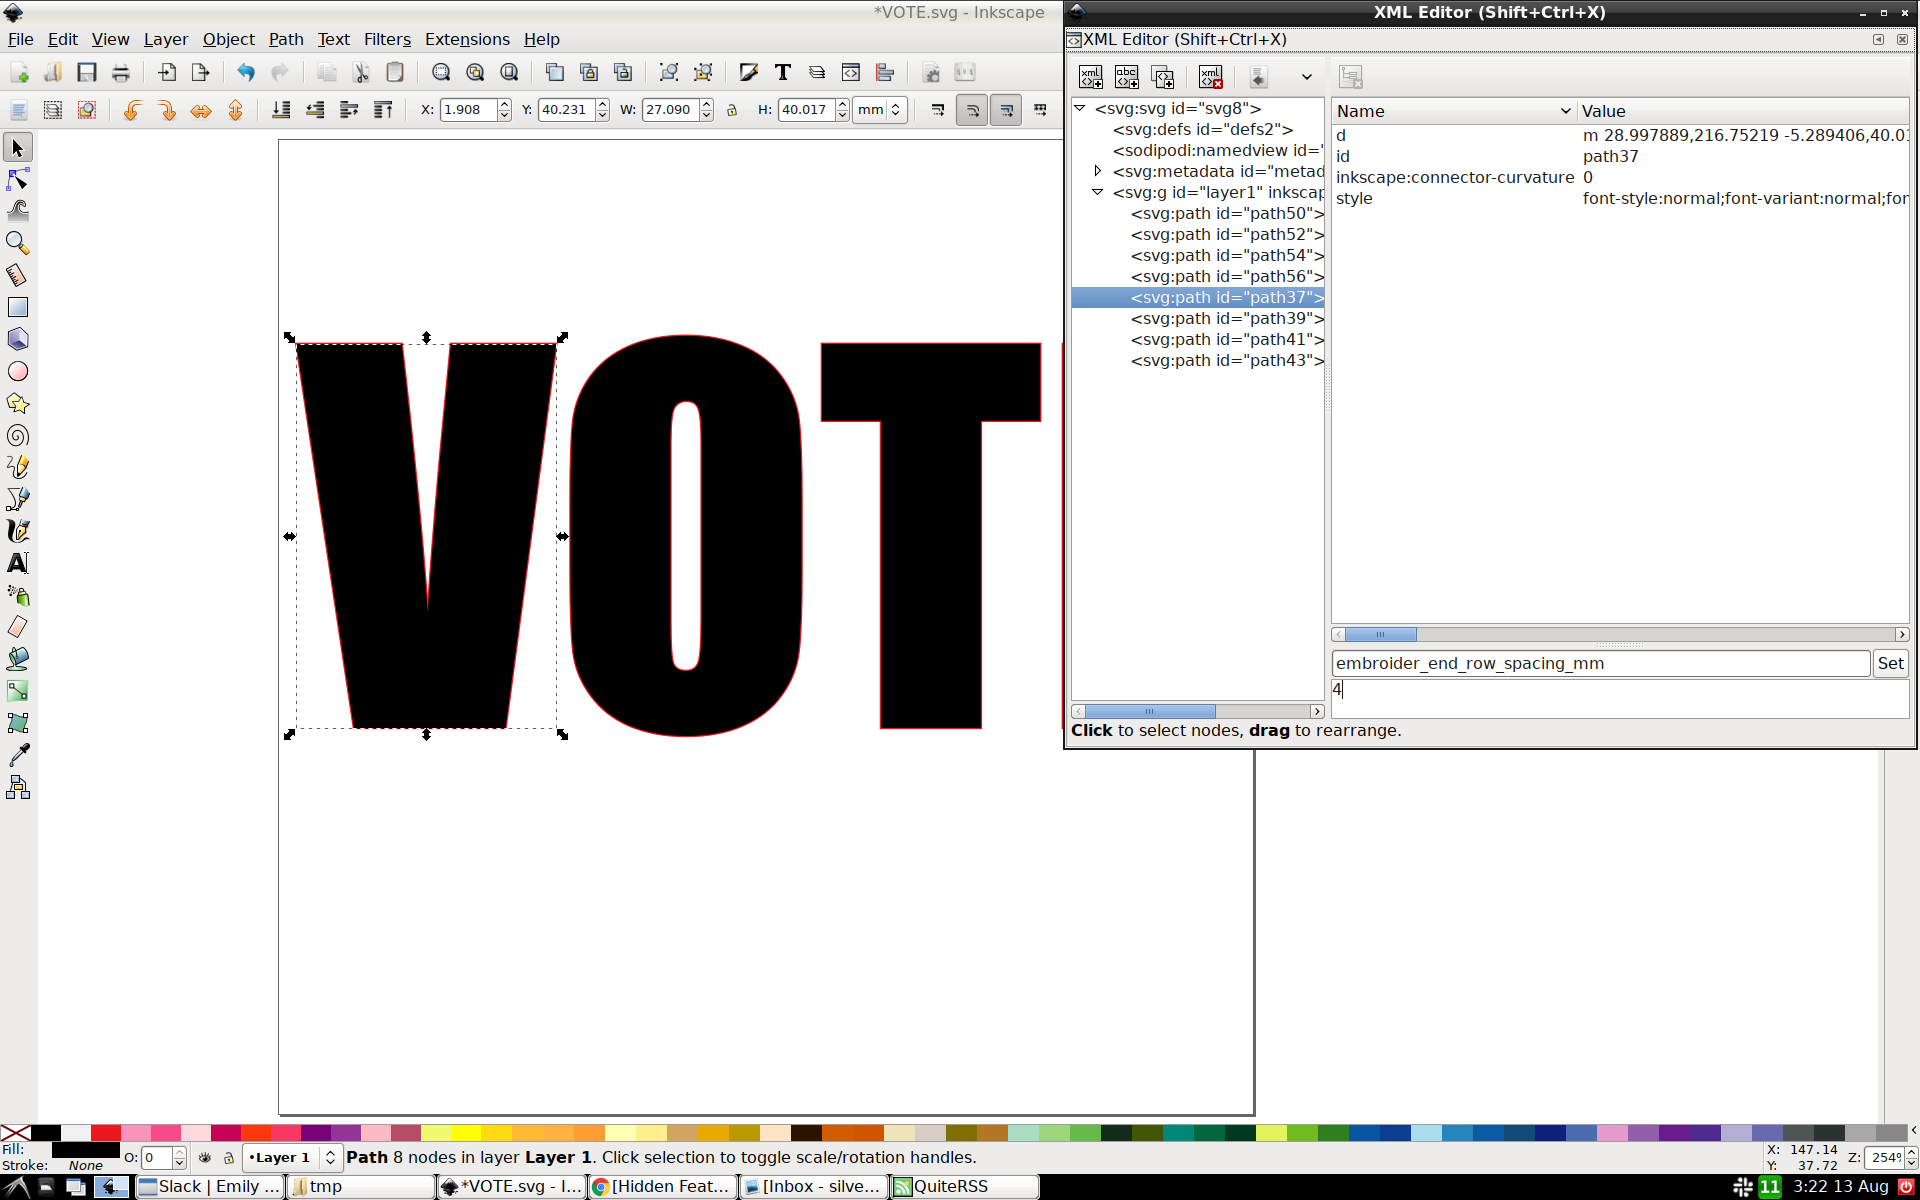
Now I’m going to use that hidden feature to change my fill. I’m going to open the XML Editor (Edit > XML Editor) and go down to the bottom, paste in embroider_end_row_spacing_mm and, because this is a pretty large-scale object, choose 4. Clicking the Set button will add it to the already-existing settings for this object, exactly none of which I have to worry about here. The same thing gets done for the other three letters.
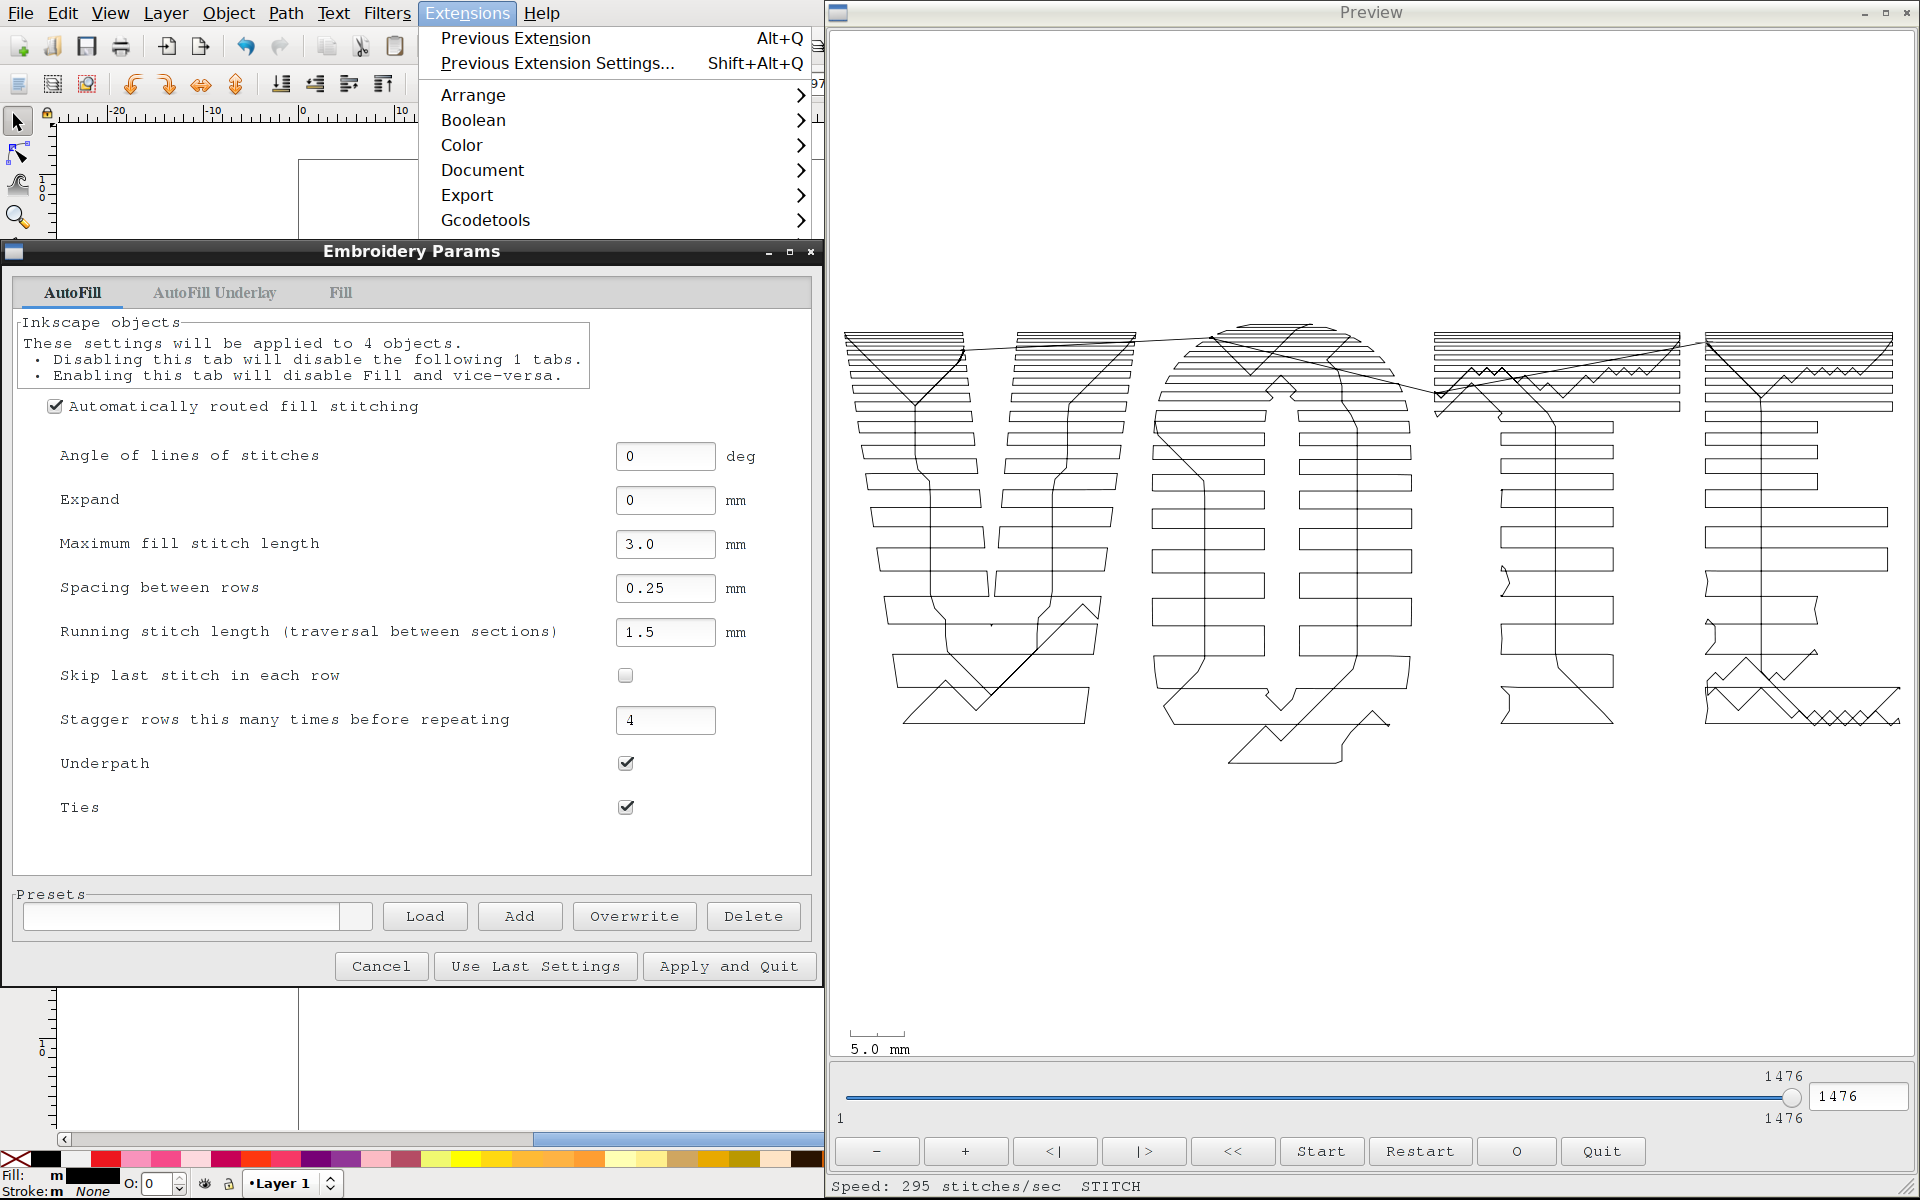
Now I can select all four objects and set the embroidery params (Extensions > Ink/Stitch > Params). Look at that fancy “gradient”! First thing I’ll need to do is turn off any underlay or underpath, because all I want is horizontal lines and they’re obviously not hiding the underpathing.
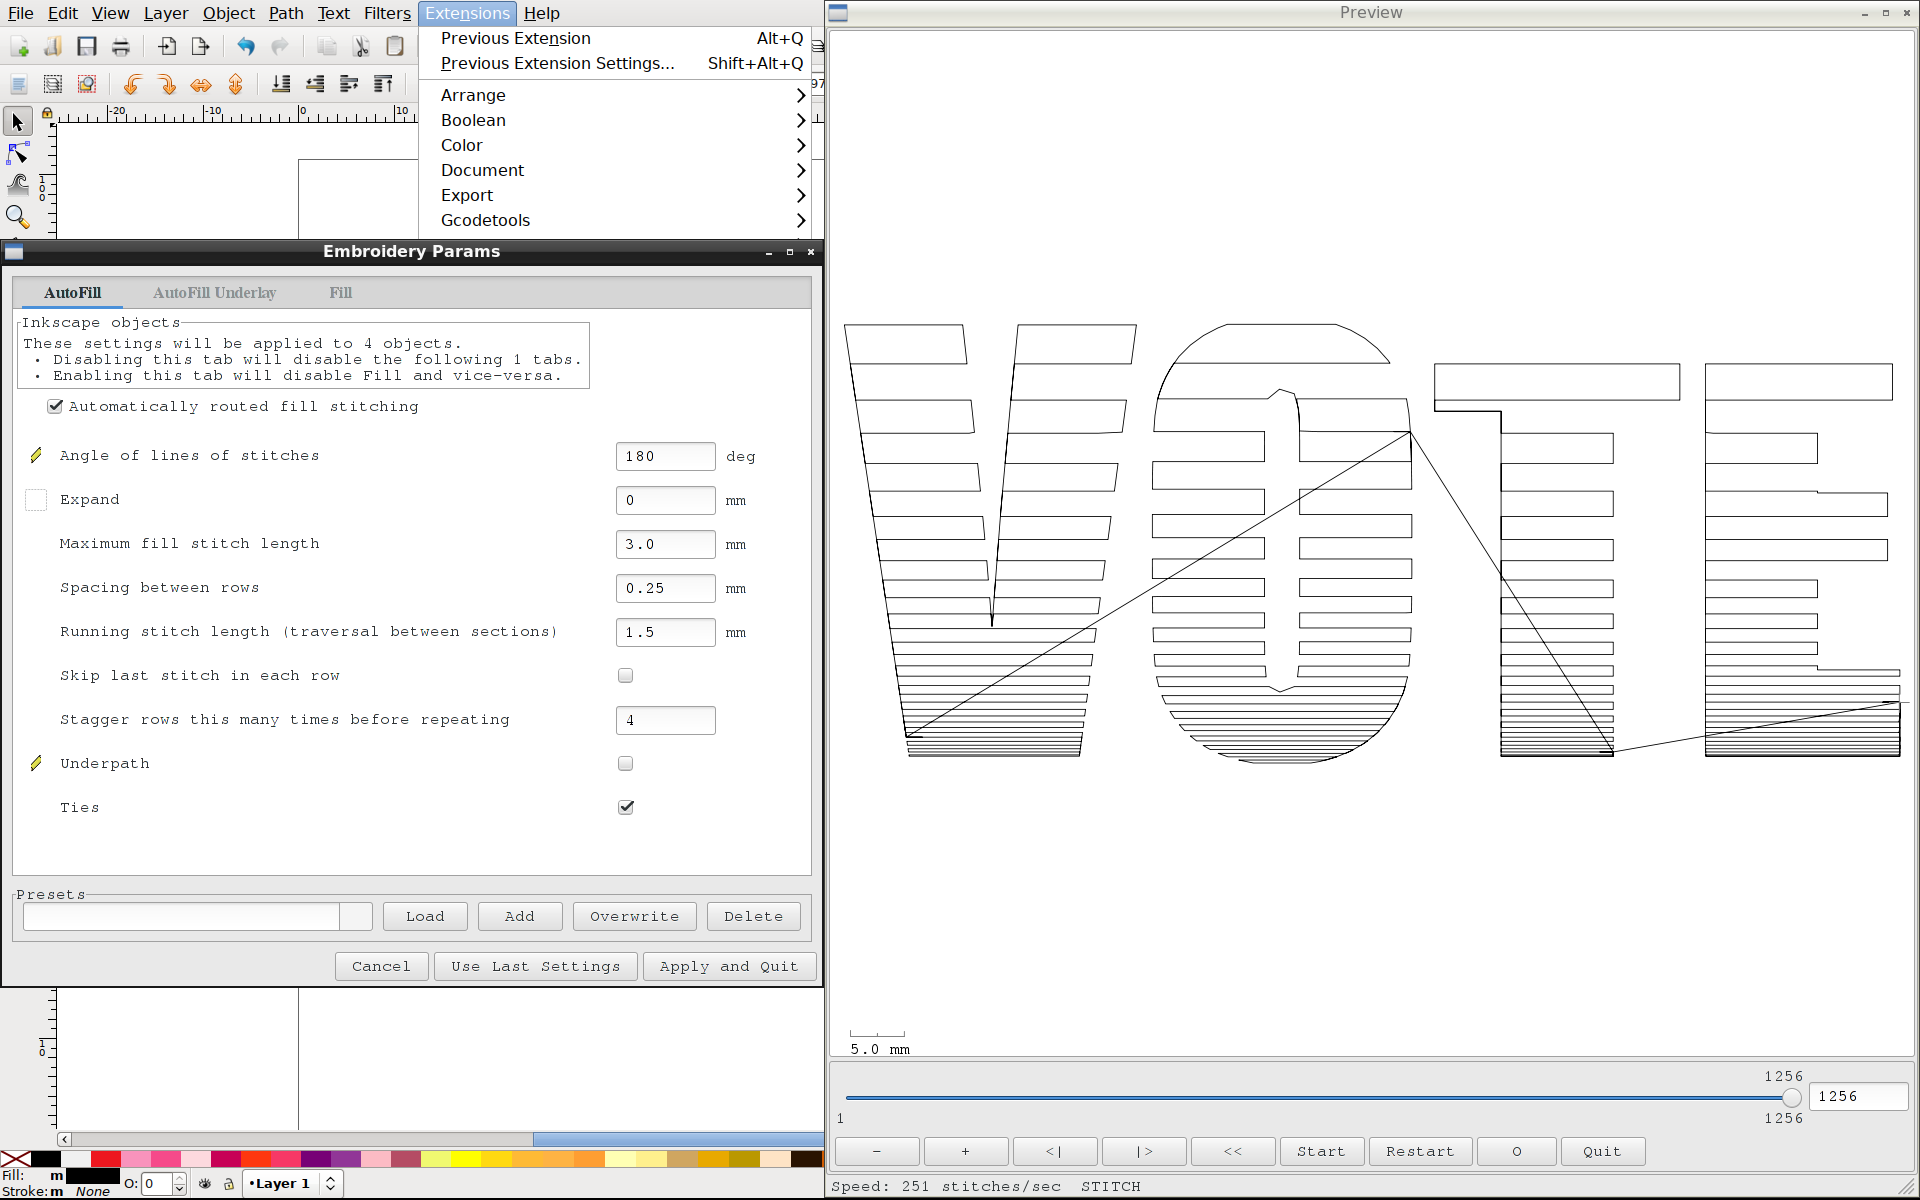
If I want the gradient to go the other way, I just have to adjust the stitch angle.
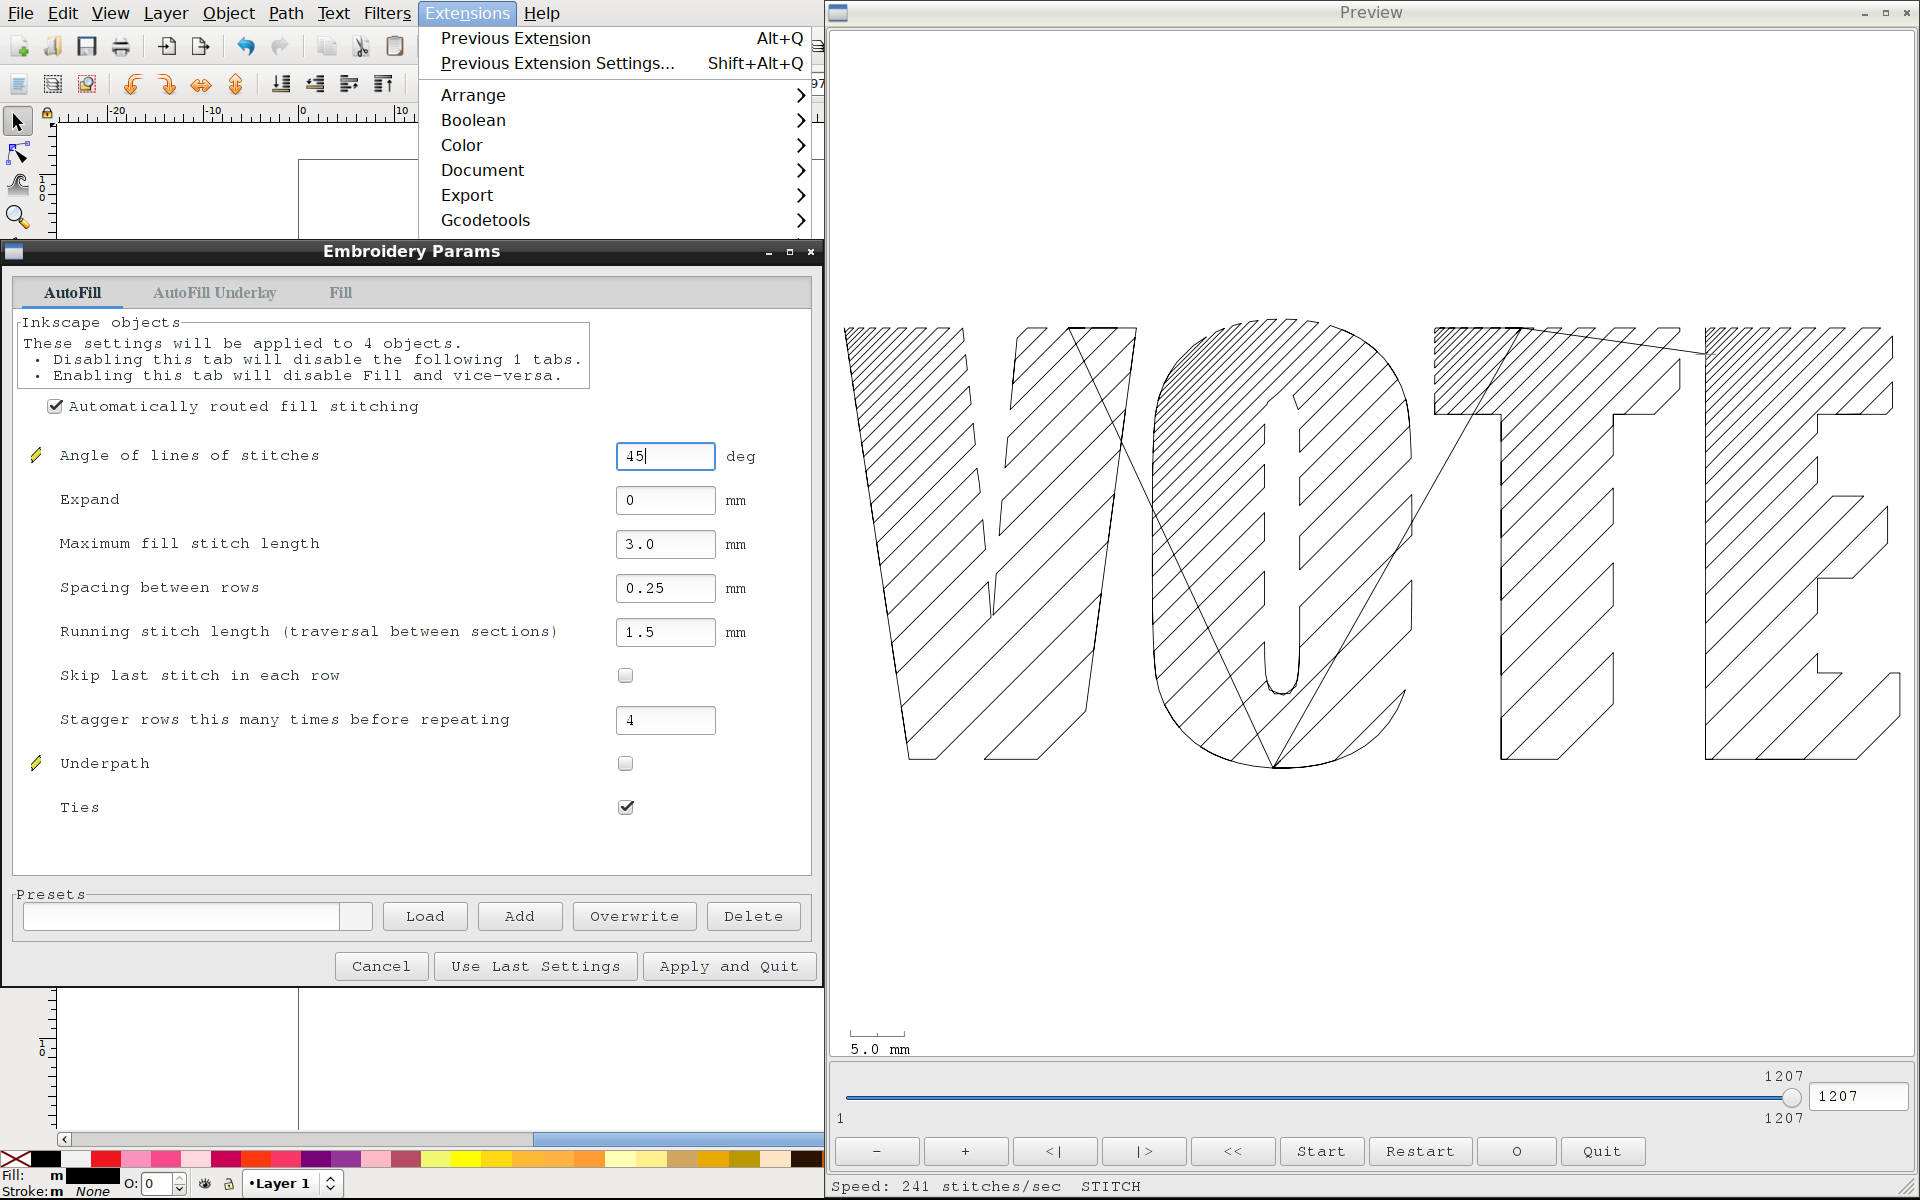
It doesn’t have to be horizontal, of course. To do a gradient from one color to the other, create a duplicate object with the stitch angle at 180 degrees to the first one: 0 and 180, or 45 and 225, and so forth.
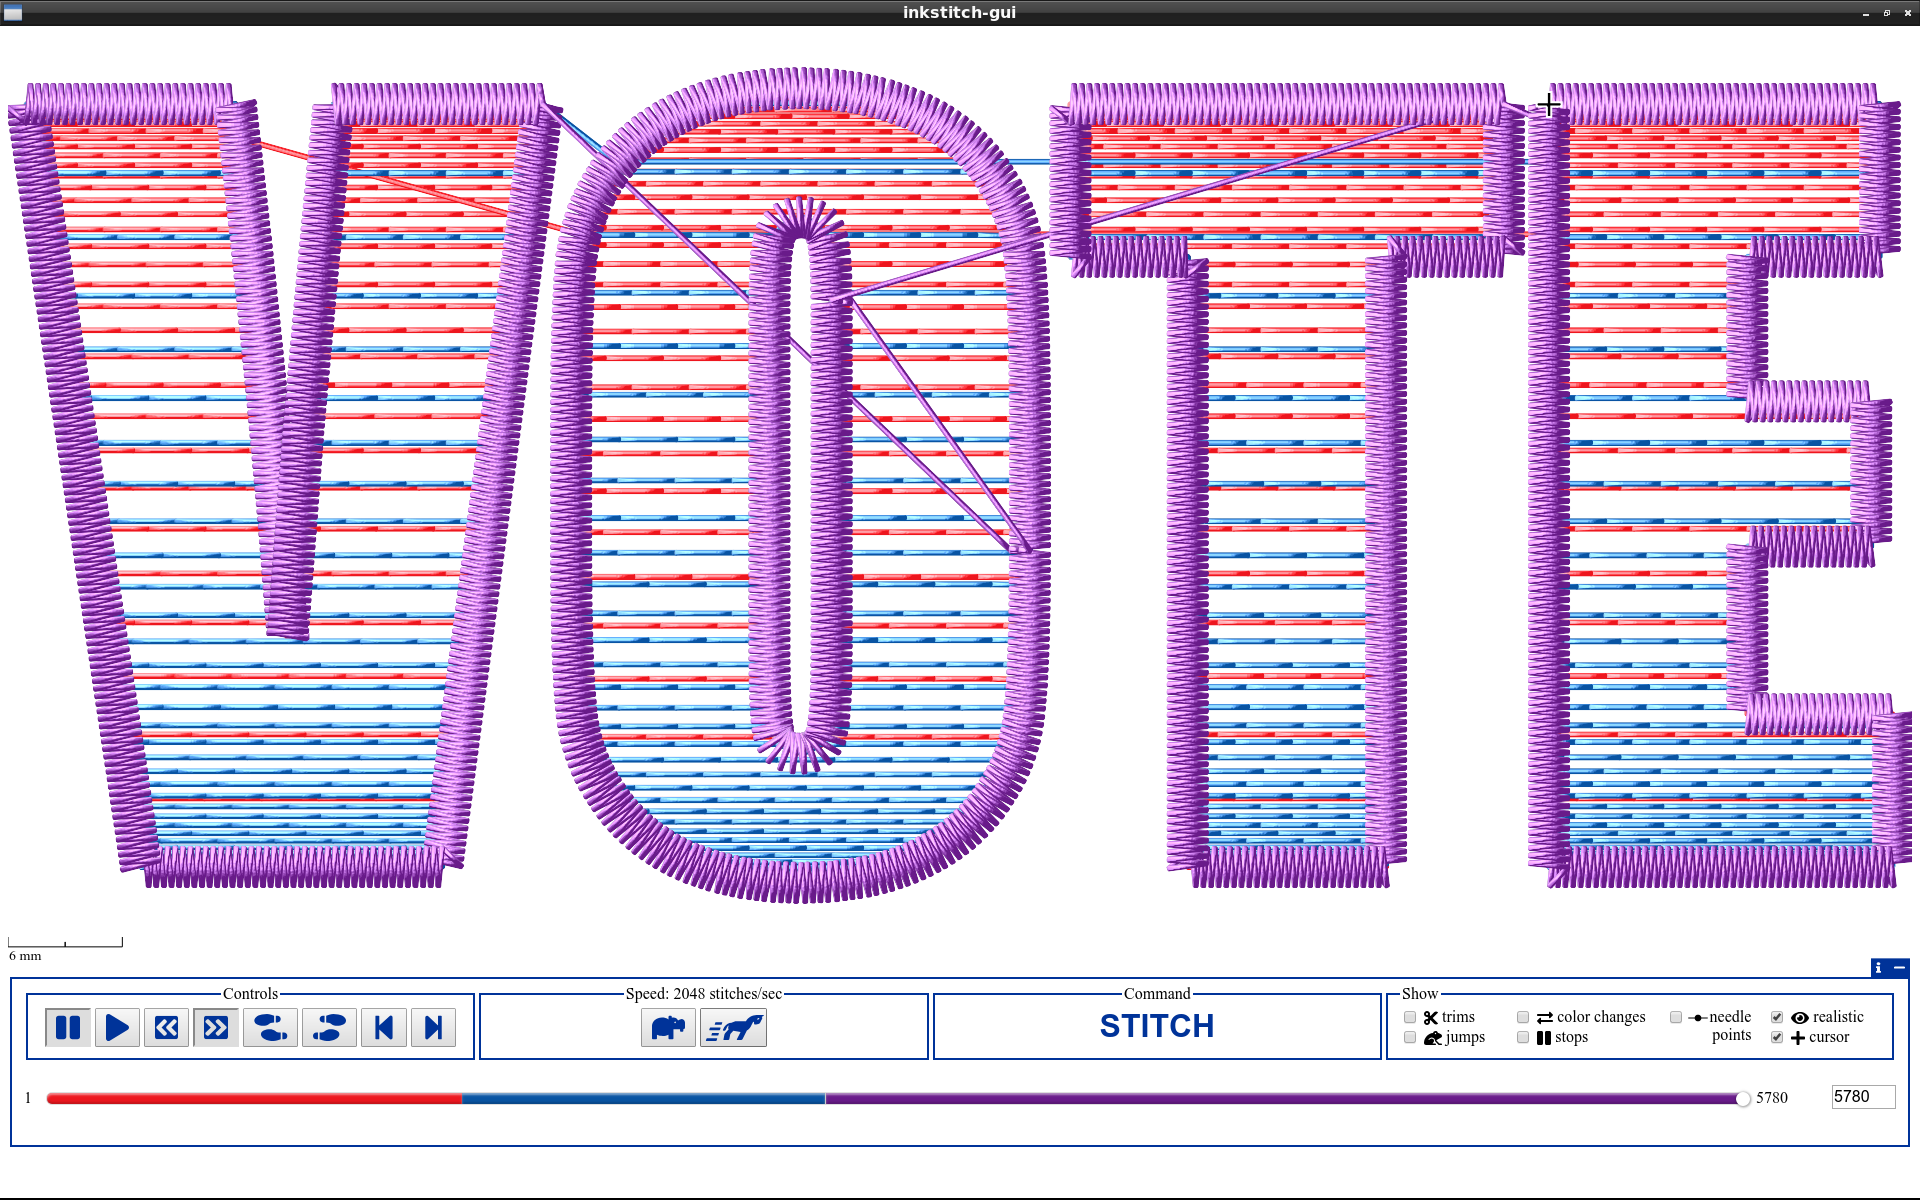
With underpathing turned off, Ink/Stitch will go around the edges of the fill to reposition itself. Once the fill is done, I’ll use that initial duplicate set of objects to run a stitch around the outside to finish it off. It can be a simple running stitch, a bean stitch, or a satin stitch.

Satin is the safest, since it’ll cover the slight shifting that probably happened as the fills pulled the base fabric around. In this case I just brought those objects to the front (because it needs stitched last) and set the stroke width to 2mm. As you can see by the corners, while this is the simplest it doesn’t always yield the best results – next tutorial will be on how to make cleaner satin stitches.
A thing I forgot in Wednesday’s post: UPS and FedEx aren’t even the answer, because more than half of the time I get shipments from both of those services delivered from USPS for the last mile.