
Satin joins and corners
An important part of digitizing fonts or outlined graphics is what happens when satins come together.
The principles here are the same for either lettering or for the black outlines of many graphics. MeowScript looks like an easy-to-digitize font. It’s monoweight, should just load in and magically come out as a satin, right? Uh… no.

First let’s look at the real shape. It’s three different outlines - the overall shape, and two interior loops. Ink/stitch doesn’t look at those and see two parallel lines without a lot of help.
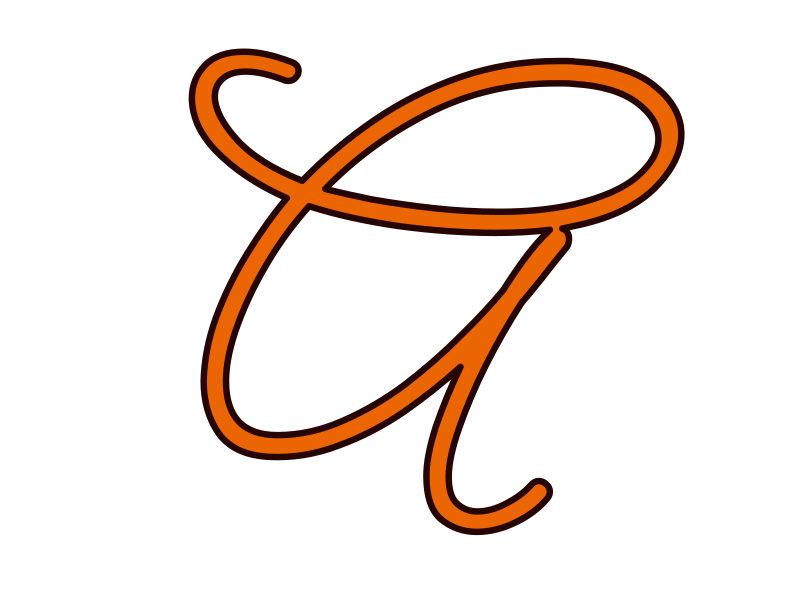
The first thing to think about is how the final satin(s) should flow. For a letter, that’s pretty easy: think about how you’d write it. So I’ll start with the first segment.
Satin beginnings
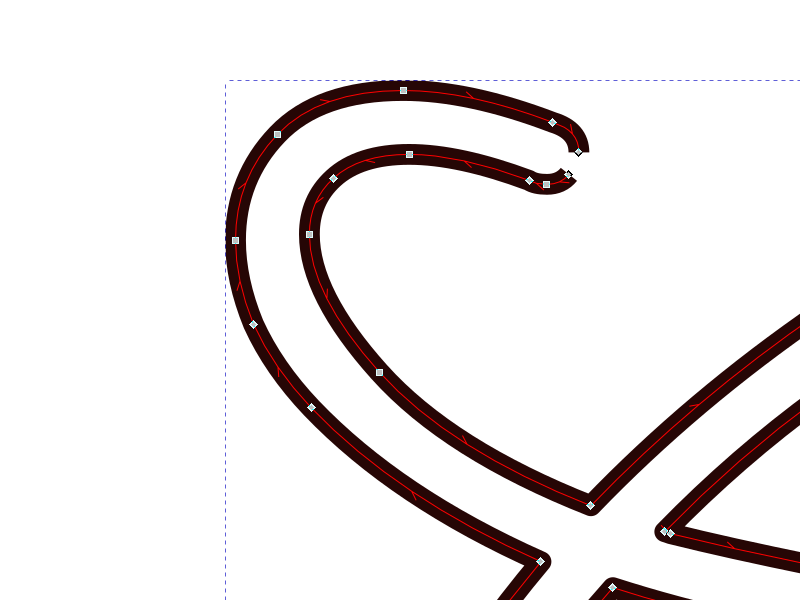
A satin stitch is two separate rails, which the needle will bounce back and forth between. So I’ll open up the beginning of the strike. Sometimes if there’s a nice centered node there I’ll just highlight and break it, but in this case I’ll just delete a segment between two conveniently-placed ones. Sometimes I have to add one or both nodes to have a segment to remove.
Satin ends
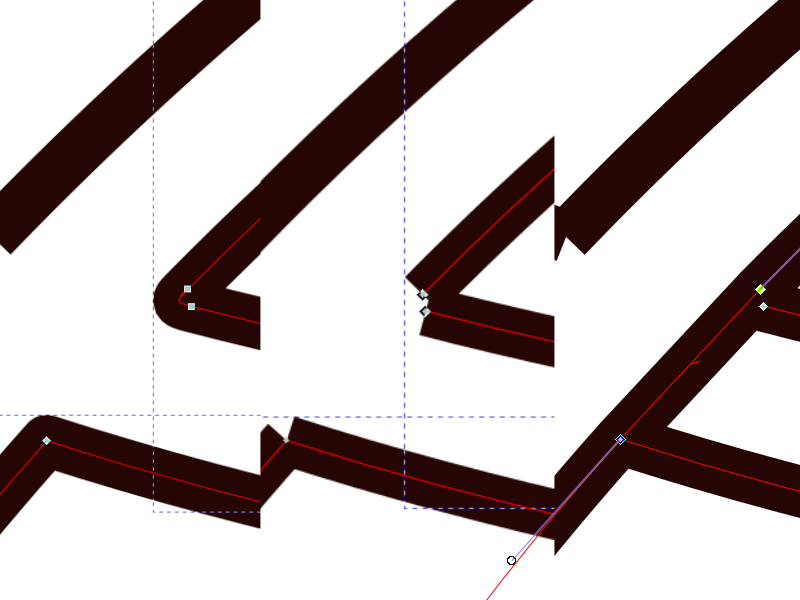
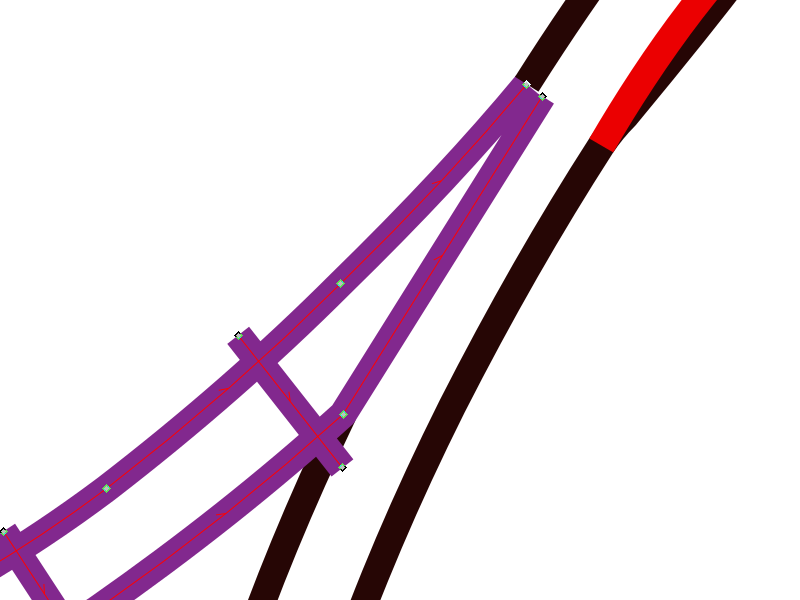
The easiest intersection to deal with is a basic crossing. In this case, this segment basically ends here since the other satin line will be on “top” of this one. I’ll break both the near corners, then Path > Break Apart to get individual segments.
You may have noticed the directional arrows - these are vital for keeping track of which way your rails go. Turn them on with Edit > Preferences > Tools > Node and checking Show path direction on outlines. (If Always show outline isn’t selected, you’ll need that too.)
Satin rungs
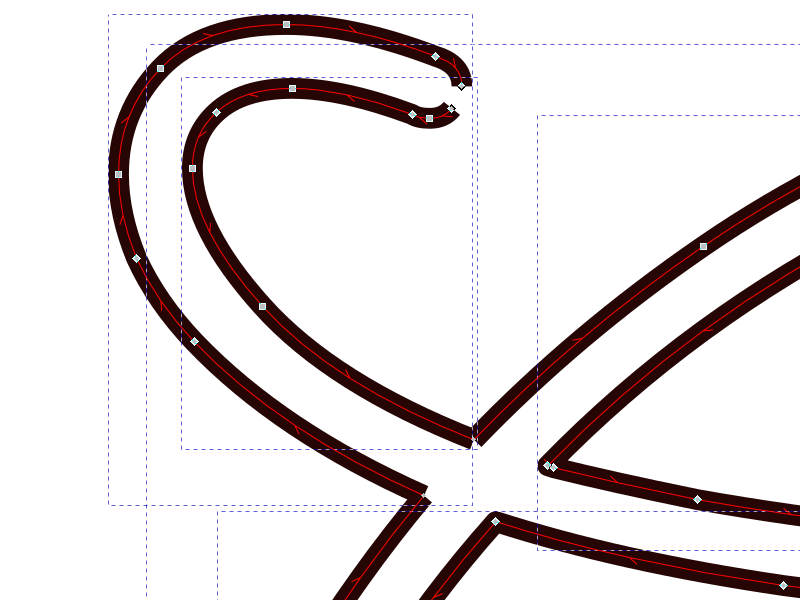
Now I’ll Path > Reverse the one that doesn’t go in my imaginary-pen direction, and Path > Combine the two segments. Coincidentally, I have eight nodes in each path. Without rungs, Ink/Stitch will treat the path as though it has rungs connecting each pair of nodes. In this case, the nodes aren’t directly across from each other so it would lead to a pretty drunken satin. So I’ll put in some proper rungs, also Path > Combine‘d to it.
Note that even the last rung is perpendicular to my “pen stroke.” The stitching will then change its angle to end by connecting the last nodes of the two rails. This is fine for such a close-to-perpendicular intersection, but if the angle were much sharper that angle change would be problematic. More on that later.
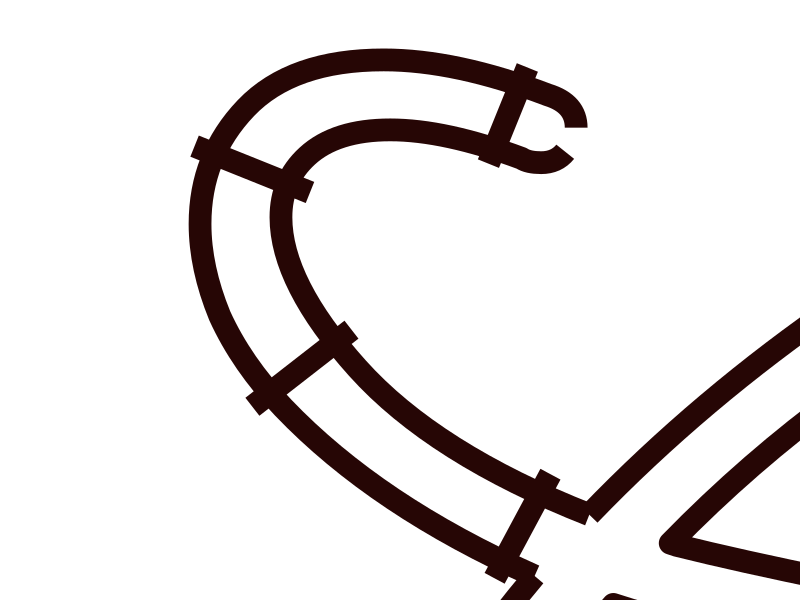
I’ll go into Extensions > Ink/Stitch > Params > Stroke and uncheck Running stitch along paths (which is effectively a radio-button with Custom Satin Column on the Satin Column tab), and my preview will show me this run stitched in satin. If you end up with a “string art” effect here, you haven’t reversed one of the rails. Using the node editor to select a node or segment on the subpath you want to reverse means that Path > Reverse will only work on that subpath.
Satin loops
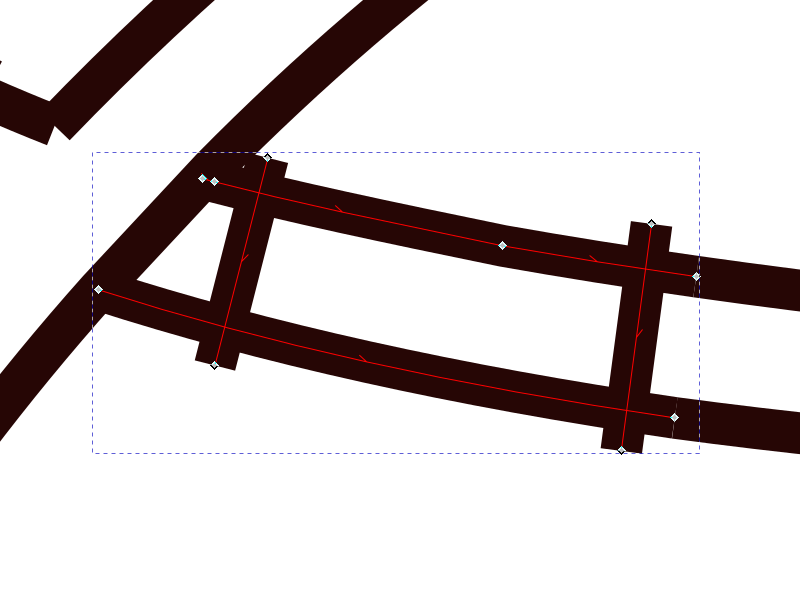
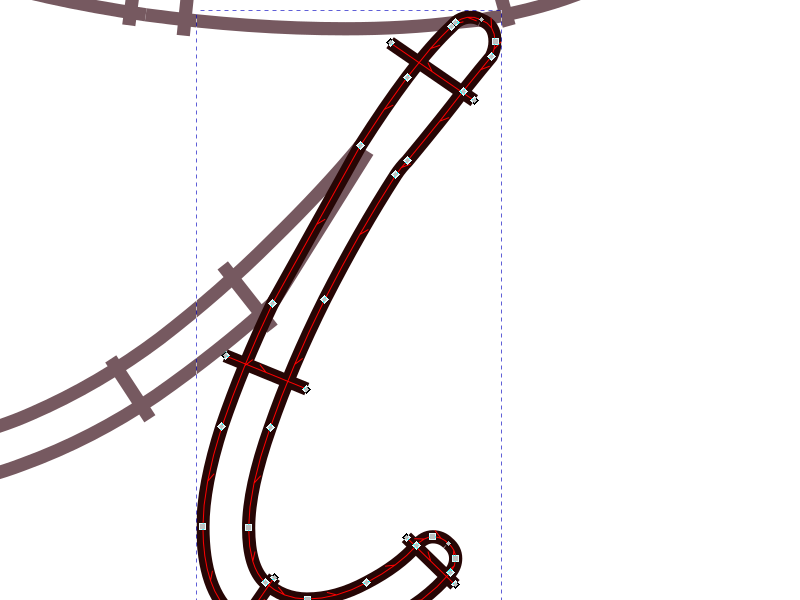
The next segment gets interesting - the part across the intersection is also the part that loops up and over to come back across here. It confuses Ink/Stitch to have a rung that even touches itself, plus one of the opposite corners isn’t a corner.
I’ll break the good corner and remove the segment that rounds off the corner. Then I’ll select the two nodes from the crossing path and add a segment between them. Barring pull compensation, the crossing satin stitch will end at the center of the line, so that’s where I want my next run of satin to begin. This means I’ll have to fill in that gap.
Turning on snapping to paths will let me match up to the line exactly. Selecting the Freehand (P) tool and hovering over the end of the too-short path will turn the node red, indicating that I’m going to connect to it and start drawing. An important side effect of this that’s significant for satins is that the Freehand tool will make that rail go in the direction you’re Freehanding. To keep Ink/Stitch from being confused, I’m going to break both rails to make a very short run. It’ll blend right into the next run as a continuous satin.
Grazing joins
Disconnecting grazing joins like this is pretty easy - just break the two nodes at the point, and re-connect the segment on the part we’re working on. I’ll deal with the other part when I get back around to it.
If there was more of an overlap, I might make the new connecting segment a curve that matched the overlap’s, but I’m not going to bother here.
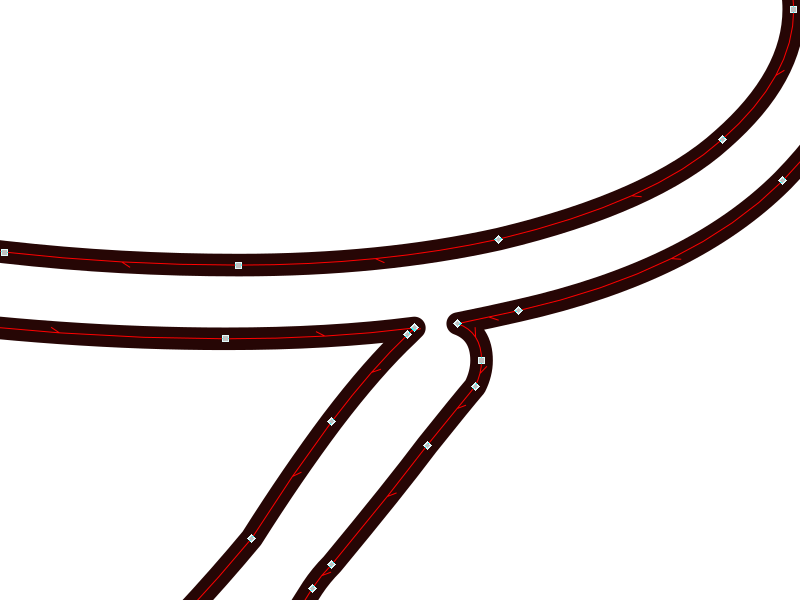
Closing up the missing segment in the first intersection, I can now pull back and see that this curve is pretty straightforward for quite a ways, but it’s going to go under itself on the stem of the A. I’ve drawn in red the missing outlines of the “pen stroke,” so I can see that it’s going to taper down and end before picking back up where it grazed the upper loop. And I broke the nodes there, so the purple bit is the run I’m working on.
Rungs have to cross both rails, so I can’t just keep continuing up the longer rail - but if I don’t, the stitches will make a hard right turn and get very long to try to connect the two rail ends. Not good.
Acute joins
The solution is to extend the missing rail. The satin will narrow down to nothing, so here I’ll make that rail extension go a little deeper under the upcoming run. Otherwise I’d have to have a little more pull compensation, and too much of that will push the “point” of the taper out where it’s visible.
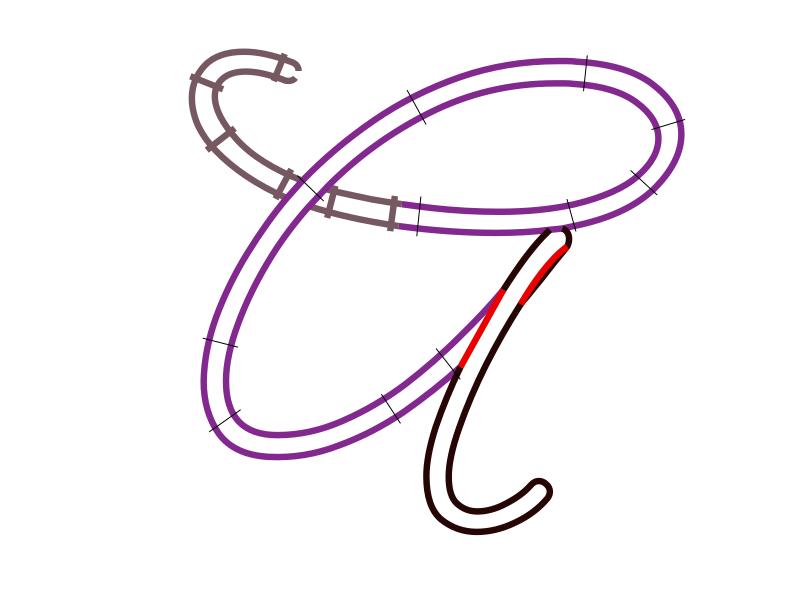
You can use this technique to miter corners as well. The Shamrock Knot is an extreme example of this. The incoming run narrows to a point, and the outgoing point widens back out, and the satin stitches never get over-extended trying to keep one end pivoting around an inner corner.
Rounded ends
Although the upstroke is technically visible to the right of the downstroke, it’s way too narrow to stitch separately at this scale. I’m just going to leave that bit merged into the downstroke. An alternative would be to adjust the structure of the letter itself, so that the up- and downstroke overlap identically during that stretch, eliminating the problem altogether.
Here I added the missing segment from that earlier grazing join, and rounded it to match the other side. The end of the stroke also had a centered node, so I broke it, reversed one side, added the rungs, and the final run is finished.
Final cleanup
In a more complicated satin run, like a graphic outline or a letter that isn’t a continous pen stroke, I might want to do more manual routing. Ink/Stitch’s Extensions > Ink/Stitch > Tools: Satin > Auto-route is useful but letting it re-order the runs is all-or-nothing, so you’ll need to help it along - pre-order them, and turn off re-ordering, if they tend to overlap the wrong directions. In this case I just need to select them in order and then choose Extensions > Ink/Stitch > Edit > Re-order and make sure they’re all going the right directions. A tiny running stitch from the end of the tapered point up to the start of the last run will keep auto-trim machines from making an unnecessary trim there, and that’s all the routing it needs.
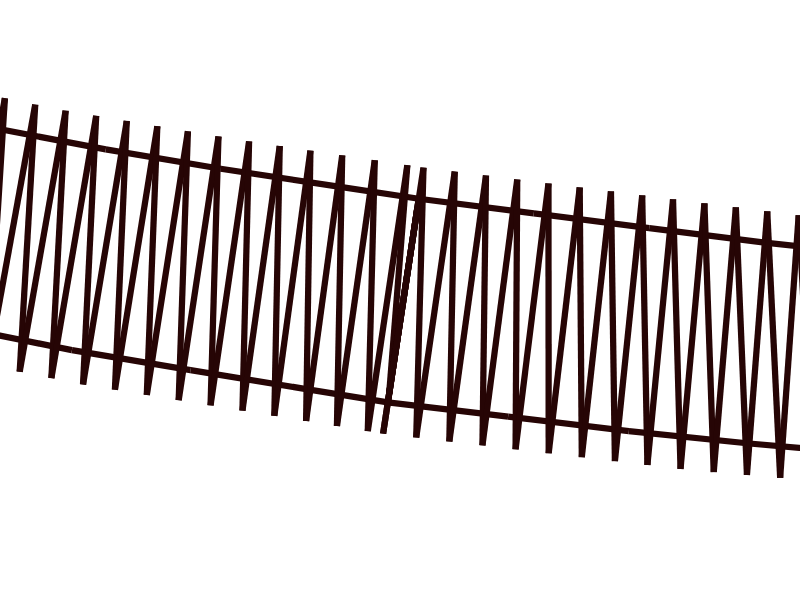
A satin stitch, in addition to having underlay options that a zigzag stitch doesn’t, is a slightly different structure: every other stitch is parallel to a rail, meaning it is more of a “Z” than a “>”. It’s a little hard to see unless you’re looking for it.
Two continuous satin runs will merge smoothly into each other, but if one makes its horizontal stitches from one side and the other makes it from the other, there will be a subtle texture change.

The close stitches are the change in runs. In the second version, the stitch “handedness” doesn’t match. To fix that, select Extensions > Ink/Stitch > Tools: Satin > Flip Satin Rails. This will cause the satin to start and end on the opposite rail, which can also be used to shorten jumps between runs.
Other tricks
A fun trick now that all this is done is to use Extensions > Ink/Stitch > Tools: Satin > Satin to Stroke to reverse-engineer a single-line font - join up all the runs, make it a bean stitch, and you have a script font that you can make very tiny. Not as useful for outlines around graphics, probably.
Splitting too-wide satins also uses Satin to Stroke - preserve the original satin, duplicate the satin and resulting stroke. Combine a stroke with a satin, and delete one original rail. Repeat with the other, deleting the other original rail instead. Result: two parallel satins. It will take a little pull compensation to not leave a line down the center, so don’t forget that.
Yet another use for the center stroke: turn it into a bean stitch and run it along the top of the satin in a contrasting color. Not very useful for graphic outlines either, but pretty for borders around appliques and such.