The hedgehog, 2006 edition
I got another request to revive a forgotten pattern. This critter was part of a plushie swap on a now-defunct swap site. I shipped it to the UK, and got a nasty review from the recipient because apparently it never arrived, and that was the end of my plushie swap career. I didn’t get anything from my sender either, as I recall.
Anyway, that isn’t why I’ve never touched the pattern again. It’s because I was way too clever with it and it ends up really needing step-by-step pictures. I’ve put that on the calendar, but in the meantime here is the 2006 version. I don’t know what happened to the higher-res images either, so you get state-of-the-art 72dpi. Basically, the top of the back wraps around to the middle of the forehead, and the bottom of the front wraps around to the back of the base. Dry-fit it at the “before you do any more sewing” part and it should make more sense, or wait until I get to revising it.
And here’s the text from 2006:
Copyright/Licenses
Copyright 2006 Silver Seams. 
This work is licensed under a Creative Commons Attribution-Share Alike 3.0 United States License.

This work is licensed under a Creative Commons Attribution-Noncommercial 3.0 United States License.
If you’re not sure what that means, the Open Source Sewing index has more details. [2022: not anymore it doesn’t]
The Pattern
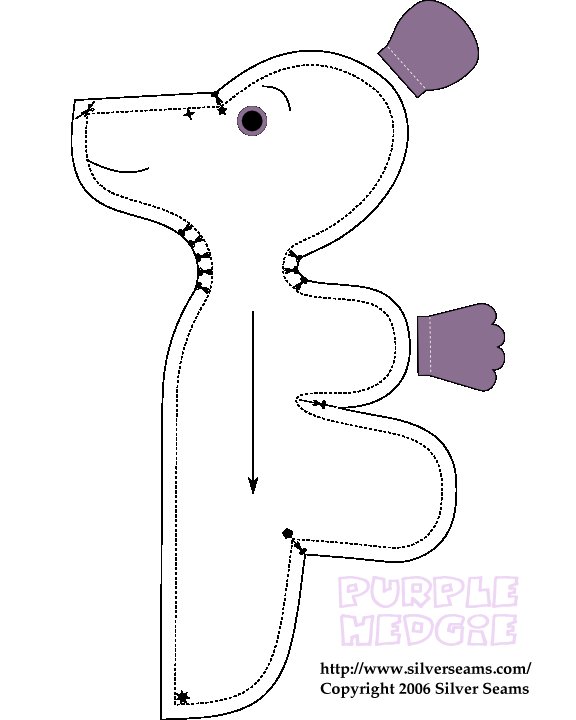

This is decidedly a funky pattern on paper, but actually pretty simple to sew if you don’t mind head gussets.
If you print these out to 72 dpi, you should end up with 8×10″ pictures.
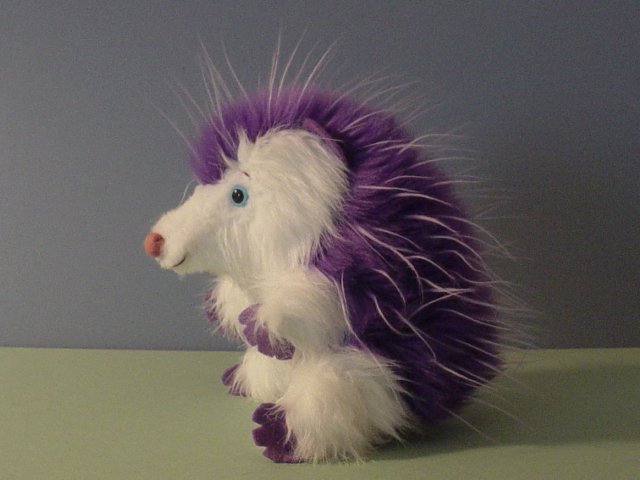
For instructional purposes, “purple” is the fur you’re using for his spikes, and “white” is the short fur for the belly.
Cut two fronts from white, one reversed.
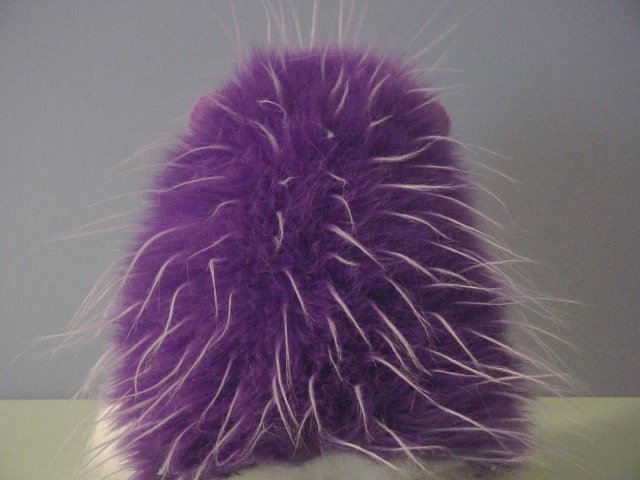
Cut one back piece from purple. Depending on the fabric you have, you may want to cut that piece with a reversed grain (fur running *toward* the nose), to make the spikes stand out better.
Cut two outer leg pieces from white, one reversed. You may find it easier to mark the legs on the white fabric, but cut them out as one piece, then cut them apart after you’ve sewn it onto the purple.
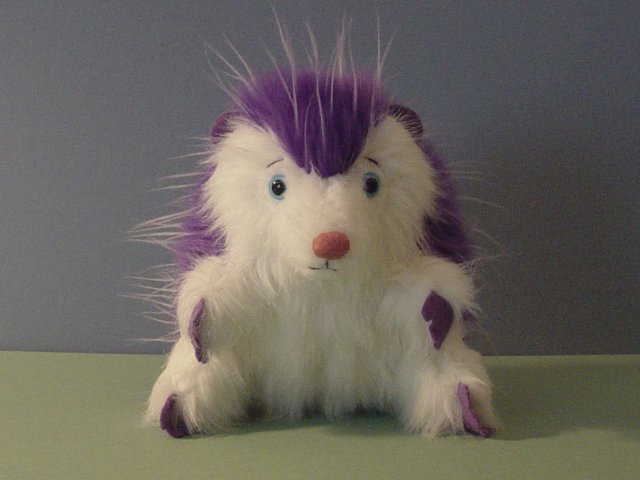
Cut two ears and four paws (if you want them) from felt. Or, if you want sturdier bits, add seam allowances and cut twice as many from calico, sew them together in pairs and turn them (clip notches between the toes if you do this).
If you aren’t using a safety nose, cut a little oval out of pink felt, sew a running stitch around the edge, and pull it tight around a ball of stuffing. Then ladder-stitch it to the end of the muzzle after the hedgie is stuffed.
Sew the outer leg pieces to the back. This combined piece will be referred to as the “back” from now on.
Before you do any more sewing, go through the following steps to make sure you see how the parts go together, and where the symbols match up. It may save you picking a seam later.
Sew the fronts together. Begin at the four-pointed star (the symbol that matches the one on the point of the back) and sew to the end of the muzzle, then all the way to the many-pointed star at the bottom (that matches the one in the middle of the back).
If you have safety eyes and nose, install them now.
Now comes the fun part – sew the front to the back. First, match up the seams carefully. It’s easiest to start with the arms/legs, since they’re a nice flat match. Pin the paws into the ends of each leg, being careful you don’t catch them in seams anywhere but the ends.
Then match the point of the top with the end of the top seam, and ease the head gusset seams together (don’t forget to pin the ears in). There’s a tricky place at the little “bump” on the purple piece, just above the seam where the outer arms are attached – if you remember that the front piece will fold there so that his arms/legs point forward, it will make sense.
Lastly, the end of the front seam matches up with the middle bottom of the back, as the bottom of the front piece folds under to become the base.
Sew this seam, leaving an opening for turning at the back of the base. Turn right-side out, stuff, ladder-stitch the turning opening closed, sew on eyes and nose if you didn’t already install them, embroider the eyebrows and mouth, and you’re done.