From the archives: Teddy Wolf

In the course of updating the blog software, I decided to finally do something about broken links. All the internal ones are fixed, aside from the papercraft Lego advent calendar which has mysteriously disappeared altogether. Now it’s time to do something about things that are still pointed to by off-site folks.
Back in 2004(!) I made a teddy bear that was a Mexican Gray Wolf, and which served as my avatar on a lot of websites. It was the early days of needlefelting, and he’s pretty advanced/experimental for then, but of course nowadays people do far more amazing stuff.
In any event, I open-sourced his pattern. Since I didn’t keep track of his open mouth variation, and a lot of his personality comes from the needle-felting, it’s really not that great of a pattern (or so Present Karen judges). Someday I’ll revise it. But in the meantime, let’s go back to 2004:
Teddy Wolf (Five-Way Jointed Gray Wolf)
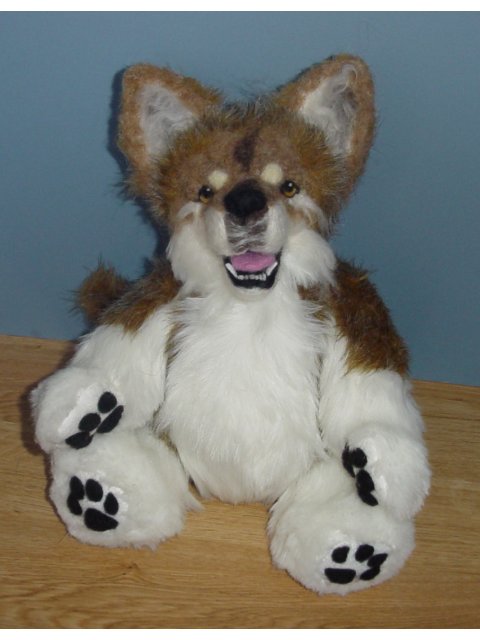
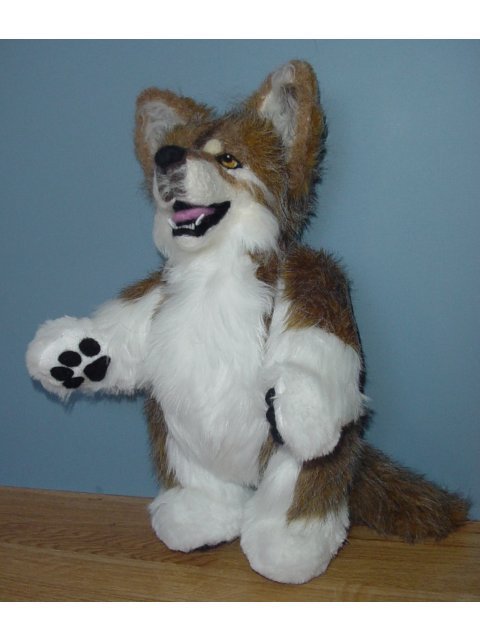
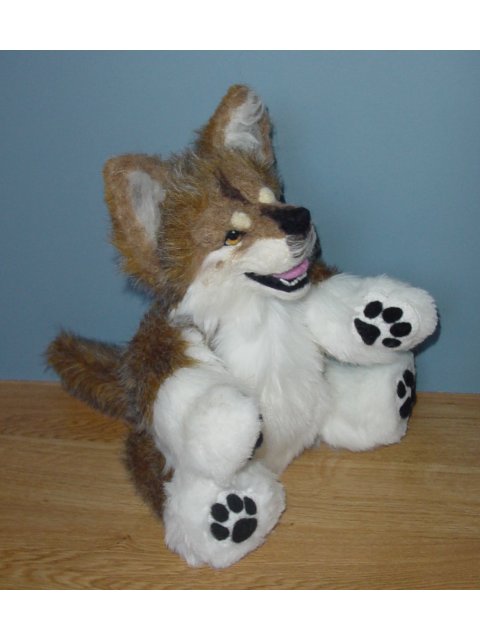
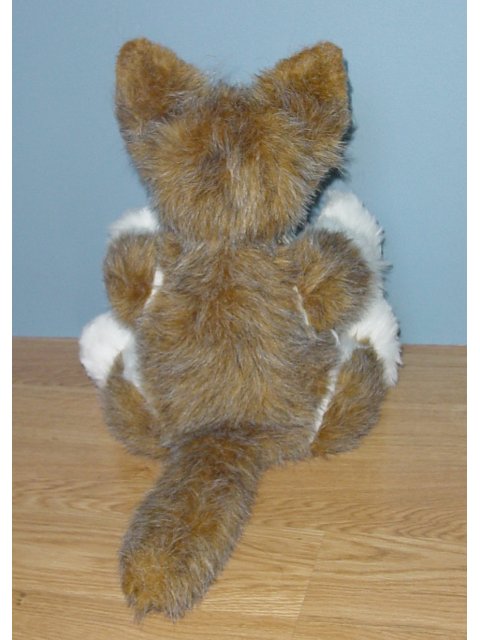
Lobo the Mexican Gray (Teddy) Wolf was my very first award-winning teddy “bear” – he took the blue ribbon in the bear category at the 2004 Kansas State Fair. I was afraid he’d be disqualified for not being a bear.
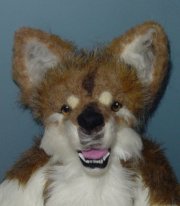
Lobo is made from the Teddy Wolf pattern, with an inserted open mouth. His head was made entirely of felt, with a fur “sock” that slipped over the back and sides and was sewn down. His face was then needlefelted on, including a felted tongue, and teeth cut from white felt and needlefelted into the black felted gums. Tufts of wool were felted inside his ears. His pawpads (front and hind) are needlefelted as well.
Copyright/Licenses
Copyright 2004 Silver Seams.

This work is licensed under a Creative Commons Attribution-Share Alike 3.0 United States License.

This work is licensed under a Creative Commons Attribution-Noncommercial 3.0 United States License.
If you’re not sure what that means, the Open Source Sewing index has more details.
The Pattern
As with the flower bear pattern, I’m assuming a basic knowledge of bearmaking. Your public library should have books on the subject, and the Teddy Wolf differs only from your average bear in shape, not general construction. Given the choice, pick up 101 Bears To Make📦, by Nancy Tillberg, which will tell you how to add an open mouth.
The outside edges of all the patterns are sewing lines – YOU MUST ADD SEAM ALLOWANCES. The inner circles on the limbs are the recommended joint sizes.
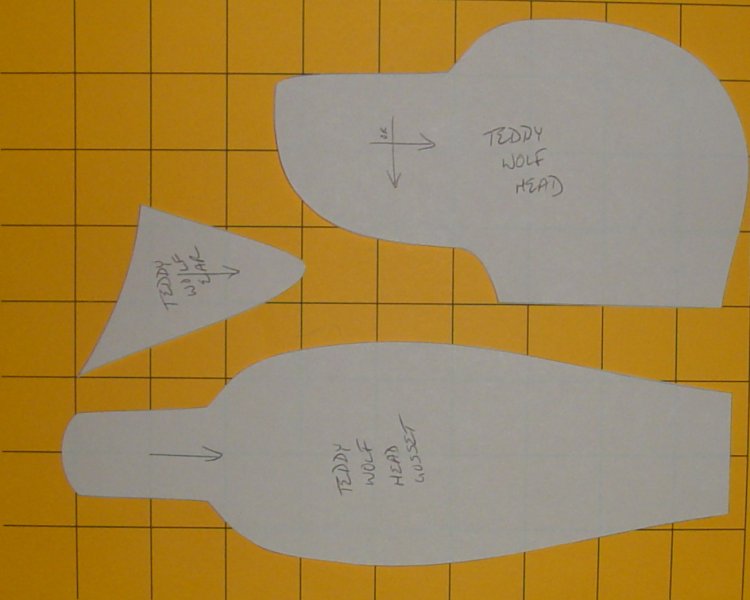
Head – This is a fairly generic canine head as is, so with some changes in fabric type and perhaps ear shape he could be turned into all sorts of different dogs (in fact, I slightly narrowed the muzzle and am making a teddy samoyed at the moment). For the felted version, I made the head out of wool felt, then made a second out of fur to cover everything but the muzzle/face area, slipped it over the felt like a bonnet, and stitched it down. This let me trim the fur fabric to exactly where I wanted it (before stitching, that is) because I wasn’t pleased with how the felting needle handled it. I also added an open mouth by cutting the felt (after lightly stuffing the head to decide where I wanted it) and then tracing the inside of the mouth onto cardstock (see Nancy’s book for more detail). Then I needlefelted the face on, including the eyes (because I didn’t have any gold eyes and I was impatient).
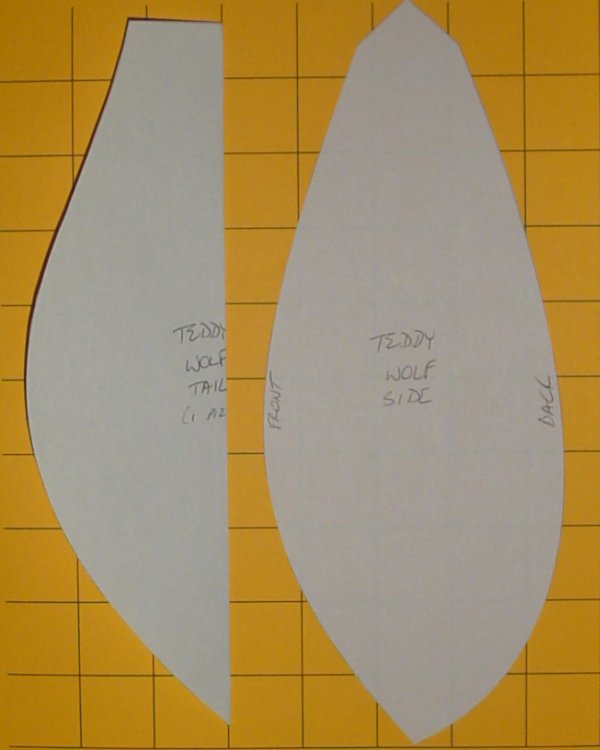
Body – This is a four-piece A-line body. Only the side piece is given (cut two, one reversed). Cut that pattern piece in half and mirror each half for the front and back patterns (coincidentally, the half with the “front” seam marked is the front). It makes for a very fat little wolf, so for the samoyed I think I printed it at 100% height, 80% width or so, and I’d recommend this for long pile fur, or if you’re using a knit-back fabric without backing.
Tail – This is a simple one-piece tail (the pattern is folded so it fits in the picture). For placement, attach after the legs have been put on, and while the wolf is seated. (You don’t want to sew on the tail and then find out he can’t sit down.)
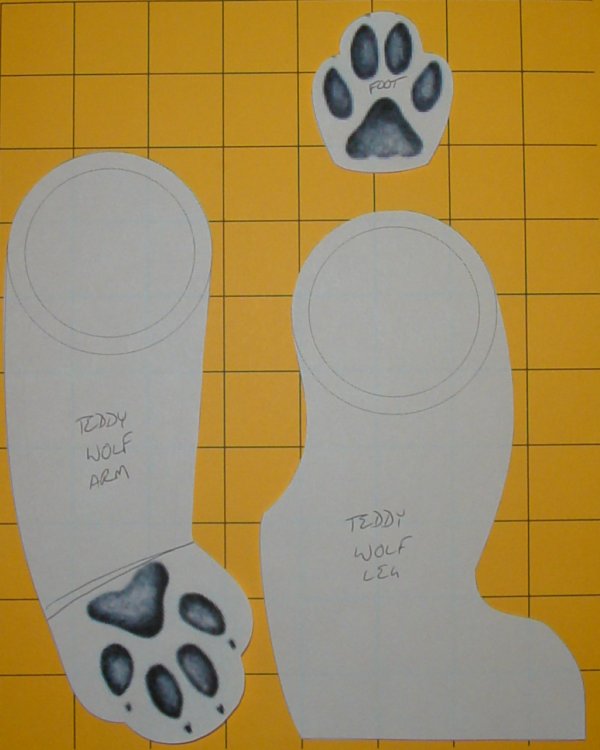
Arms/Legs – Pay no attention to the working lines behind the curtain. That is, except for the inner circles, which will give you a guideline for joint disc size. For the pictured wolf, I pieced the inner arms, making a separate pawpad piece out of the white felt, and then used the wolf tracks to felt the pawpads on. They’re fully dimensional, but you may choose to just cut pads out of black felt and sew or glue them on.